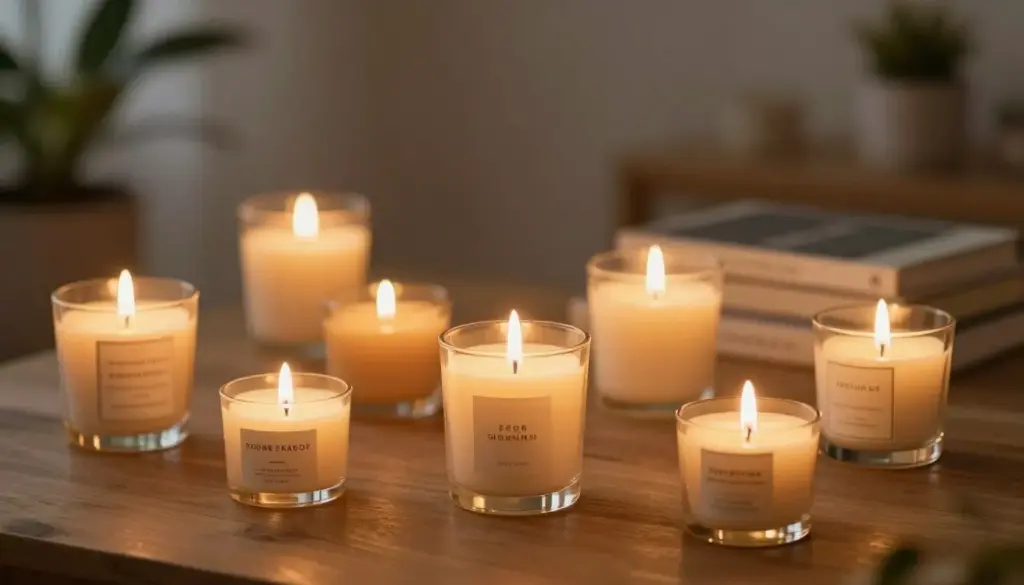
Creating your own candles at home transforms a simple craft into a deeply satisfying experience. The gentle flicker of a candle you made yourself brings warmth and pride to any space. Whether you want to fill your home with custom scents, create thoughtful gifts, or simply enjoy a relaxing hobby, candle making at home for beginners offers an accessible entry point into this timeless craft.
This comprehensive guide walks you through everything you need to know. You’ll discover which materials work best, learn essential techniques, and master the step-by-step process. By the end, you’ll have the confidence to create professional-quality candles right in your own kitchen.
The beauty of candle making lies in its simplicity. You don’t need expensive equipment or special skills. With just a few basic supplies and a bit of patience, you can craft candles that rival store-bought options. Let’s explore this rewarding craft together.
Why Start Making Your Own Candles?
Homemade candles offer benefits that extend far beyond the finished product. When you make candles at home, you control every ingredient. This means no mystery chemicals or synthetic fragrances that can irritate sensitive noses. You choose natural soy wax and pure essential oils instead.
Cost savings add up quickly. A single batch of supplies creates multiple candles at a fraction of retail prices. That expensive boutique candle costing forty dollars? You can make something similar for less than eight dollars in materials.
The creative possibilities seem endless. Mix unique scent combinations that match your mood or season. Pour wax into vintage teacups, mason jars, or concrete vessels. Add dried flowers, embed crystals, or create layered colors. Each candle becomes a personal expression of your style.
Candle making also provides genuine stress relief. The meditative process of melting wax, blending scents, and watching your creation take shape offers a peaceful escape from daily pressures. Many beginners find the craft surprisingly therapeutic.
Benefits of Homemade Candles
- Complete control over ingredients and quality
- Significant cost savings compared to retail
- Unlimited creative and customization options
- Perfect for personalized gift giving
- Therapeutic and relaxing hobby
- Environmentally friendly with natural materials
- No harmful chemicals or synthetic fragrances
Considerations to Keep in Mind
- Initial investment in basic supplies needed
- Learning curve for perfect results
- Requires patience during cooling process
- Storage space needed for materials
- Some trial and error expected
- Safety precautions must be followed
Essential Materials You’ll Need for Candle Making
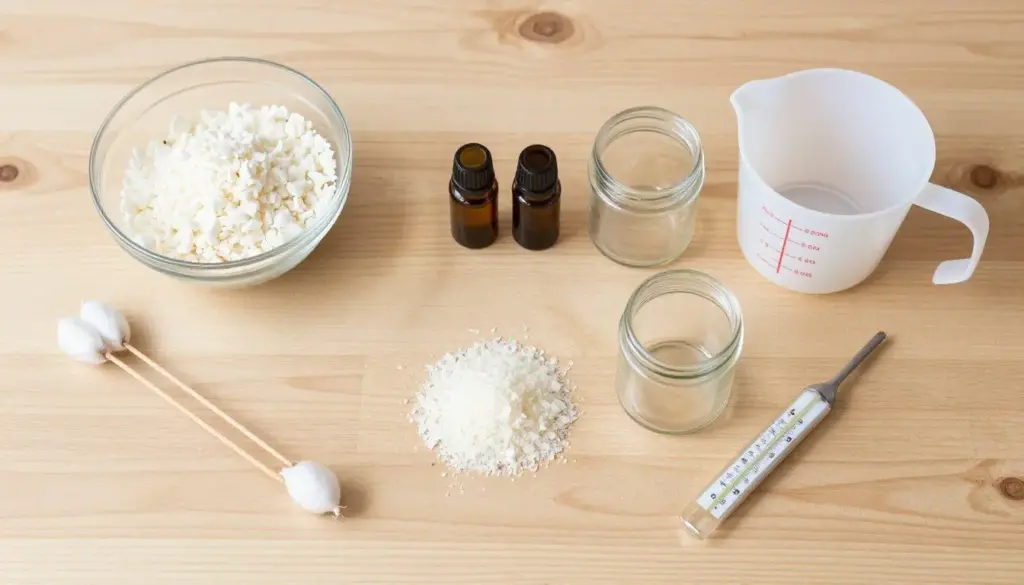
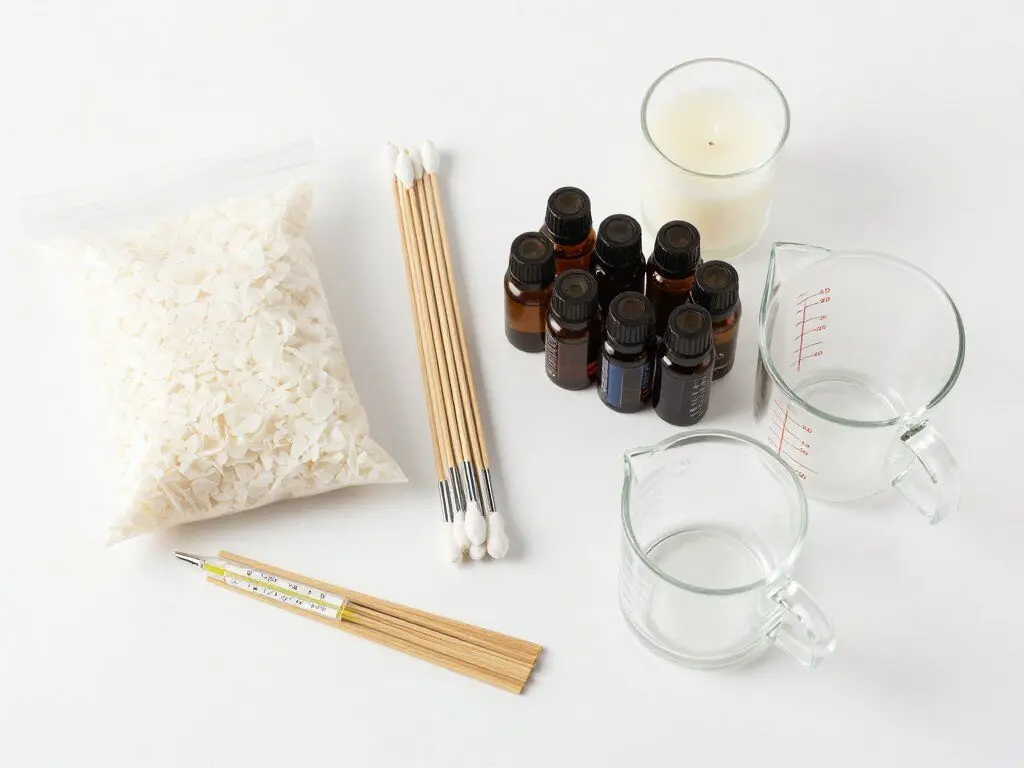
Success in candle making starts with gathering the right supplies. Fortunately, the basic materials list remains short and straightforward. You probably have some items in your kitchen already. Here’s everything you’ll need to get started with this rewarding craft.
Choosing the Right Wax for Beginners
Soy wax stands out as the ideal choice for those just starting their candle making journey. This natural wax comes from soybean oil and offers several advantages over other types. Soy wax melts at a lower temperature, which means you can use a simple microwave instead of complicated double boiler setups.
The low melting point also makes soy wax safer for beginners. You’re less likely to overheat it or burn yourself. Soy wax holds fragrance beautifully and burns longer than paraffin alternatives. It’s also eco-friendly, renewable, and easy to clean up with just soap and water.
Look for soy wax flakes rather than blocks. Flakes melt more evenly and measure more easily. A one-pound bag typically makes three to four medium candles. Start with natural, unbleached soy wax flakes for the purest results.
Understanding Candle Wicks
The wick might seem like a small detail, but it significantly impacts how your candle burns. Cotton wicks work best for soy wax candles. These natural fiber wicks create a steady, even flame without producing excess smoke or soot.
Wick size matters more than most beginners realize. The container diameter determines which wick width you need. A wick that’s too small creates tunneling, where wax remains along the edges. Too large creates excessive flames and smoking.
For containers measuring two to three inches across, use small wicks. Medium containers of three to four inches need medium wicks. Pre-tabbed wicks save time since they come with metal bases already attached. Choose wicks measuring at least nine inches long for deeper containers.
Selecting Fragrances and Essential Oils
Essential oils provide natural scent for your homemade candles. These concentrated plant extracts offer authentic aromas without synthetic chemicals. Lavender, eucalyptus, peppermint, and citrus oils work especially well for beginners.
Fragrance oils offer another option with more variety. These specially formulated oils blend natural and synthetic ingredients to create complex scents. Many fragrance oils specifically designed for candle making provide stronger, longer-lasting aromas than essential oils alone.
The amount of fragrance oil or essential oils you add depends on your preference and the wax amount. Generally, use six to ten percent fragrance load. For one pound of soy wax, add approximately one to one and a half ounces of scent. Start conservatively and increase in future batches if desired.
Some essential oils blend beautifully together. Try lavender with vanilla, lemon with peppermint, or eucalyptus with rosemary. Keep notes on your combinations to recreate favorites.
Get Your Complete Candle Making Starter Kit
Everything you need to create your first batch of beautiful candles. Our beginner-friendly kit includes premium soy wax flakes, cotton wicks, essential oils, glass containers, and a detailed instruction guide. Start crafting today with confidence.
Containers and Molds
Glass containers remain the most popular choice for homemade candles. They’re heat-resistant, showcase your creation beautifully, and come in countless shapes and sizes. Mason jars offer a classic look and wide availability. Small glass jars from used candles work perfectly after cleaning.
Teacups create charming vintage-style candles. Wide-mouth jars allow better scent throw. Straight-sided containers make removal easier if you want to reuse the vessel. Whatever you choose, ensure it’s heat-safe and has no cracks or chips.
Avoid plastic containers completely, as they can’t withstand hot wax temperatures. Metal tins work well for travel candles. Ceramic containers add elegance but require careful temperature management.
Tools and Equipment
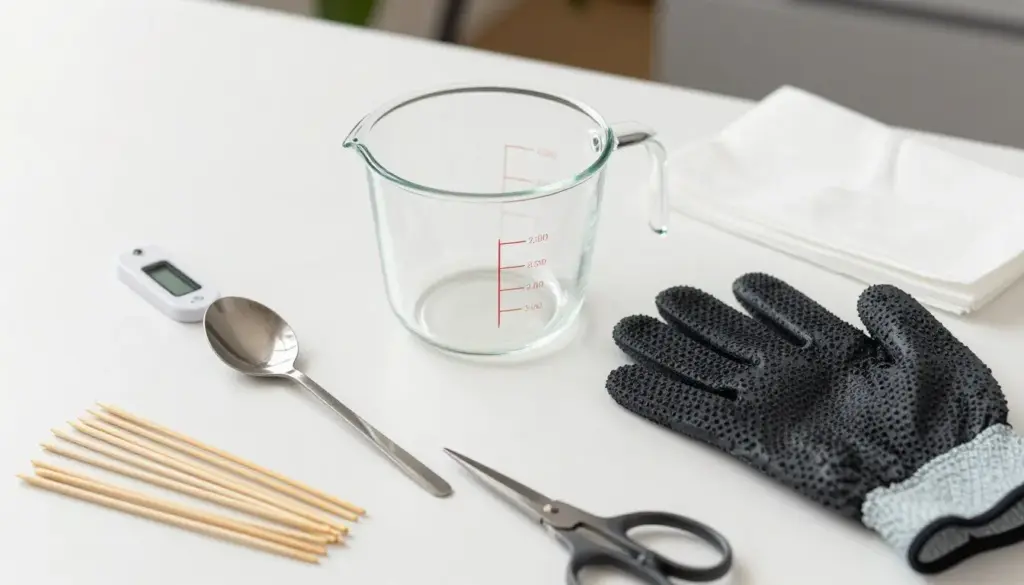
A microwave-safe container with a pouring spout makes melting and pouring wax much easier. A sixteen-ounce Pyrex measuring cup works perfectly. You’ll also need a metal spoon for stirring, bamboo skewers or chopsticks to hold wicks centered, and a thermometer to monitor wax temperature.
A pot holder or thick towel protects your hands when handling hot containers. Paper towels help with cleanup. If you plan to add color, liquid candle dye works best with soy wax. Start with just a few drops for pastel shades.
Keep these supplies dedicated to candle making. Wax residue proves difficult to remove completely, so don’t use your regular cooking tools.
Complete Supply Checklist for Beginners
Having all your materials ready before you start makes the candle making process smooth and enjoyable. This comprehensive checklist ensures you won’t need to stop mid-project searching for forgotten items. Check off each item as you gather your supplies.
Core Ingredients
- Soy wax flakes (one to two pounds)
- Cotton wicks with metal tabs
- Essential oils or fragrance oils
- Liquid candle dye (optional)
Equipment Needed
- Microwave-safe measuring cup
- Metal stirring spoon
- Thermometer
- Bamboo skewers or chopsticks
- Pot holder or thick towel
- Paper towels
Containers & Extras
- Glass jars or containers
- Scissors for trimming wicks
- Labels (optional)
- Ribbon or decorations
Safety Guidelines for Candle Making at Home
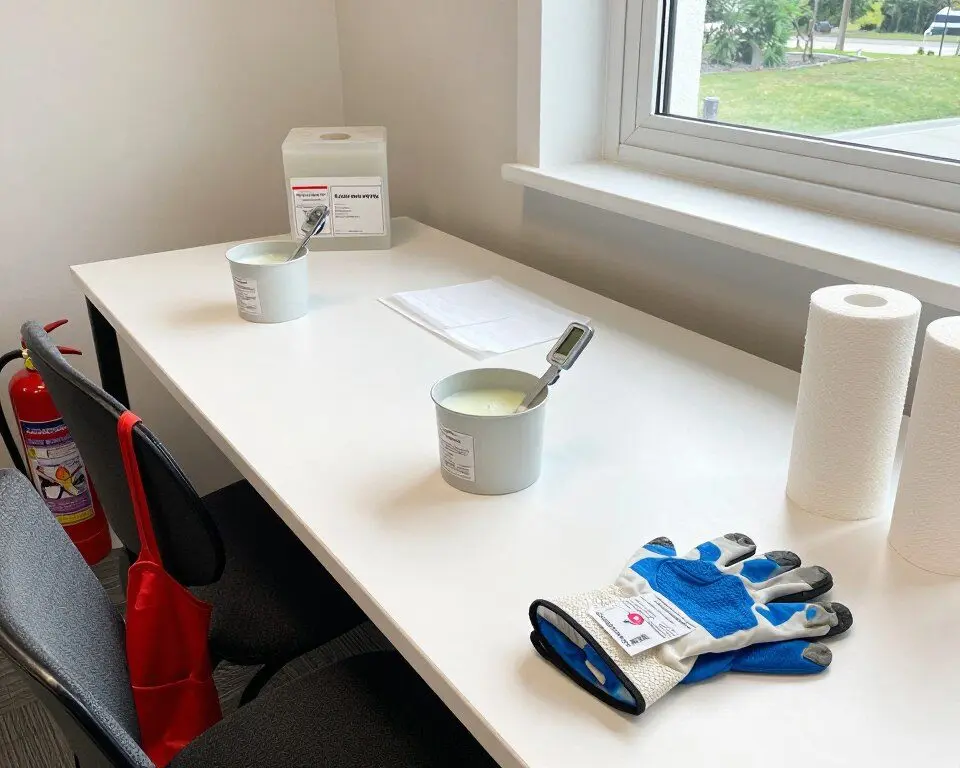
Safety comes first when working with hot wax and open flames. Following basic precautions keeps you protected and ensures your candle making experience remains enjoyable. These guidelines help prevent accidents and create a secure workspace.
Never leave melting wax unattended. Wax can overheat quickly and potentially ignite. Stay in the kitchen or workspace whenever you have wax in the microwave or on the stove. Keep a fire extinguisher nearby just in case.
Protect your skin from hot wax burns. Always use pot holders or thick towels when handling containers of melted wax. The glass gets extremely hot and can cause serious burns. If wax spills on your skin, run cold water over the area immediately.
Critical Safety Reminders
Never add water to hot wax. This causes dangerous splattering and potential fires. Water and wax don’t mix safely at high temperatures.
Don’t heat wax above 200°F (93°C). Overheating changes the wax properties and creates fire hazards. Soy wax typically melts between 120-180°F.
Keep children and pets away from your workspace. Hot wax and fragrance oils pose risks to curious little ones and animals.
Work in a well-ventilated area. While soy wax and essential oils are natural, strong scents can overwhelm small spaces. Open windows or turn on fans to maintain fresh air circulation.
Use a thermometer to monitor wax temperature accurately. Guessing leads to mistakes. Different steps require specific temperatures. Adding fragrance oil to wax that’s too hot burns off the scent. Pouring at the wrong temperature creates surface defects.
Wear old clothes or an apron. Wax stains fabric and proves difficult to remove. Tie back long hair. Roll up sleeves. Remove dangling jewelry that might catch or fall into hot wax.
Keep your workspace clean and organized. Wipe up spills immediately before they harden. Lay newspaper or paper towels under your work area for easy cleanup. Having everything in place prevents accidents caused by reaching or rushing.
Recommended Safety Equipment
A reliable thermometer ensures accurate temperature monitoring throughout the process. Heat-resistant gloves protect your hands when handling hot containers. Consider keeping a small fire extinguisher in your crafting space for added peace of mind.
Step-by-Step Candle Making Process
Now comes the exciting part where you transform raw materials into beautiful candles. This detailed walkthrough guides you through each step of the candle making process. Take your time and enjoy watching your creation come to life.
Step One: Measure and Melt Your Wax
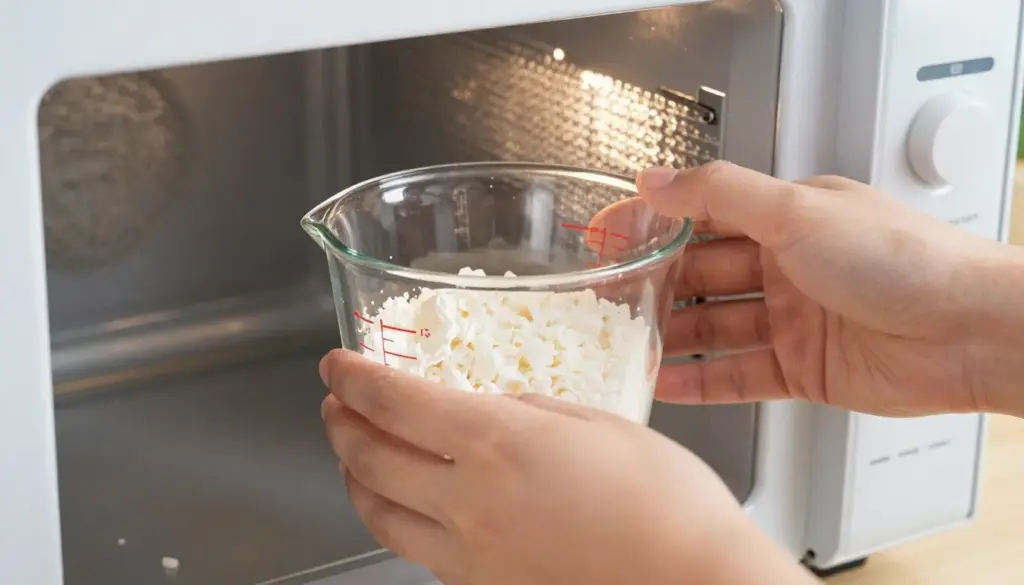
Pour soy wax flakes into your microwave-safe measuring cup. The amount depends on your container size. Generally, wax reduces to about half its volume when melted. For a standard eight-ounce jar, start with one and a half cups of wax flakes. It’s better to have a bit too much than too little.
Place the measuring cup in your microwave. Heat on medium power in twenty-second intervals. This prevents overheating and ensures even melting. After each interval, remove the cup carefully using your pot holder. Stir the wax thoroughly with your metal spoon.
Continue this process until all solid pieces disappear. The wax should look completely clear and smooth. This typically takes three to five minutes total, depending on your microwave’s power. Insert your thermometer to check the temperature. Allow wax to reach about 160-170°F for soy wax.
Watching the wax transform from solid flakes to liquid proves mesmerizing. The process itself brings a sense of calm and anticipation. Stir slowly and mindfully, appreciating each step of the transformation.
Step Two: Prepare Your Wick
While your wax melts, prepare the wick for your container. Take one wick with its metal tab attached. Dip just the metal end into your melted wax for a few seconds. This helps the wick adhere to the container bottom.
Immediately press the waxed metal tab firmly into the center of your clean, dry container. Hold it in place for about ten seconds until the wax cools enough to secure it. The wick should stand straight up on its own.
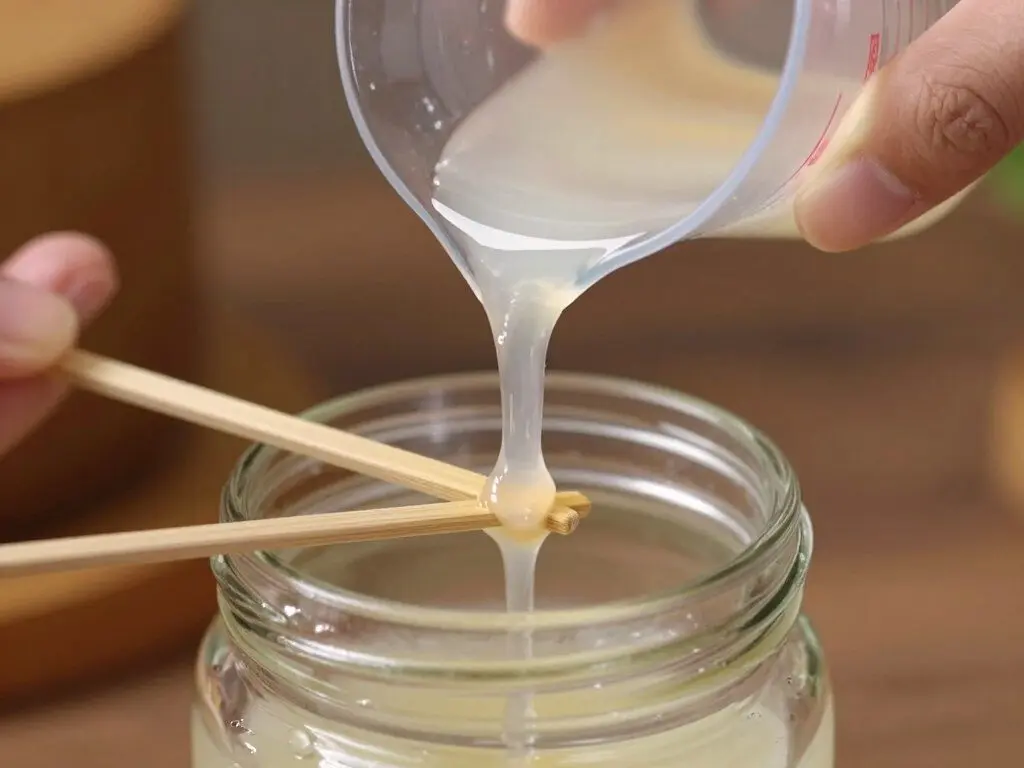
Place two bamboo skewers or chopsticks across the top of your container. Position the wick between them, pulling it taut but not tight. The skewers hold the wick perfectly centered while the wax cools. This prevents the wick from drifting to one side.
Make sure the wick stands completely vertical. A crooked wick creates uneven burning later. Take a moment to adjust the skewers until the alignment looks perfect. This small detail makes a big difference in your finished candle.
Step Three: Add Your Scent
Let your melted wax cool to around 160-170°F before adding fragrance. This temperature range allows the scent to bind properly with the wax without burning off. If the wax gets too hot, the heat destroys the fragrance molecules.
Add your chosen essential oils or fragrance oil to the melted wax. Start with six to eight drops for a small candle. For stronger scent, use ten to twelve drops. Larger candles need more. Generally, use one ounce of fragrance per pound of wax as a starting point.
Stir the fragrance into the wax slowly and thoroughly. Mix for at least one full minute to distribute the scent evenly throughout. This step determines how well your finished candle throws fragrance when burning.
Creating custom scent blends adds a personal touch. Try combining lavender with vanilla for a soothing aroma. Mix peppermint with eucalyptus for an energizing scent. Lemon and rosemary create a fresh, clean fragrance. Keep notes on your combinations for future reference.
Pro Tip: Close the fragrance oil bottle and take a whiff of your mixture before pouring. This gives you an idea of the finished scent strength. You can add a few more drops if needed, but you can’t remove excess fragrance once added.
Step Four: Add Color (Optional)
If you want colored candles, now’s the time to add dye. Soy wax typically produces pastel shades regardless of how much dye you use. This characteristic gives homemade candles a soft, natural appearance.
Add liquid candle dye one drop at a time. Stir thoroughly after each drop. The color appears darker in liquid form than in the finished candle. Start with just five to ten drops for a subtle tint. You can always add more color, but you can’t lighten wax once dye is added.
Remember that colored wax looks more vibrant when first poured. It lightens as it cools and hardens. Test a small amount on a white plate to see the final color before committing to the entire batch.
Step Five: Pour the Wax
Allow your wax mixture to cool to about 130-140°F before pouring. This lower temperature helps prevent cracking, shrinkage, and air bubbles. Check your thermometer to confirm the temperature. Patience at this stage produces better results.
Hold your measuring cup with the pot holder. Pour slowly and steadily into your prepared container. Aim for the side of the container rather than directly onto the wick. This technique minimizes air bubbles and keeps the wick centered.
Fill your container to about half an inch from the top. Leave room for the wax to settle. Pour slowly to maintain control and prevent splashing. The steady, mindful pour becomes a meditative moment in the process.
If you notice the wick shifting during pouring, stop immediately. Adjust the bamboo skewers to recenter it before continuing. A centered wick ensures even burning in your finished candle.
Step Six: Let the Wax Cool and Set
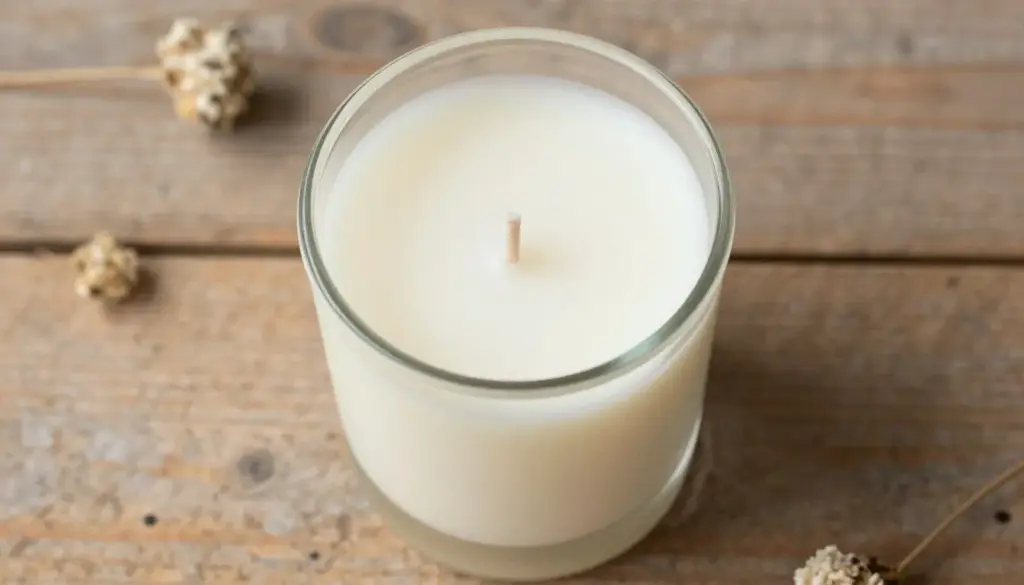
Place your candle on a flat, level surface away from drafts and direct sunlight. The cooling process takes three to four hours for most candles. Larger candles may need longer. Resist the temptation to move or touch the candle during this time.
As the wax cools, you might notice a slight sink hole forming around the wick. This happens naturally and doesn’t affect candle quality. You can either leave it as is or do a second pour to fill the depression once the first layer hardens completely.
For a second pour, reheat a small amount of leftover wax to about 160°F. Gently pour just enough to fill the sink hole. Let this layer cool completely as well. This optional step creates a smooth, professional-looking top.
The wax might also pull away slightly from the container sides as it cools. This normal occurrence doesn’t impact how your candle burns. Commercial candles often show the same characteristic.
Step Seven: Trim and Finish
Once your candle cools completely and feels solid throughout, remove the bamboo skewers. Trim the wick to about one-quarter inch above the wax surface. This length creates the ideal flame size when you light your candle.
Use sharp scissors for a clean cut. Wick trimmers work even better if you plan to make candles regularly. A properly trimmed wick prevents smoking and ensures even burning. Never leave wicks longer than half an inch.
Clean any wax drips from the outside of your container with a damp cloth. Add a decorative label if desired. Tie ribbon around the top for a gift-worthy presentation. Your homemade candle is now complete and ready to enjoy.
Before lighting your creation for the first time, let it cure for at least twenty-four hours. This resting period allows the fragrance to distribute fully and the wax to reach its hardest state. The wait makes the first lighting even more special.
Essential Tips for First-Time Candle Makers
Learning from others’ experiences saves time and prevents frustration. These practical tips help beginners avoid common pitfalls and create better candles from the very first batch. Keep these insights in mind as you develop your candle making skills.
Temperature Control
Accurate temperature monitoring makes the biggest difference in candle quality. Invest in a reliable thermometer from the start.
- Never exceed 200°F when melting wax
- Add fragrance between 160-170°F
- Pour wax around 130-140°F
- Let wax cool slightly between steps
Wick Selection
The right wick size prevents common burning problems. Match wick width to your container diameter carefully.
- Use small wicks for narrow containers
- Choose medium wicks for standard jars
- Try large wicks for wide vessels
- Test burn to verify proper sizing
Fragrance Balance
Finding the perfect scent strength takes experimentation. Start conservative and increase in future batches.
- Begin with six to eight percent fragrance load
- Add essential oils at correct temperature
- Stir thoroughly for even distribution
- Keep detailed notes on amounts used
Troubleshooting Issues
Understanding common problems helps you correct them quickly. Most issues have simple solutions.
- Frosting appears naturally on soy wax
- Sink holes can be filled with second pour
- Wet spots don’t affect burn quality
- Cracks indicate pouring temperature too hot
The First Burn Matters Most
When you light your candle for the first time, let it burn until the entire top surface melts to the edges. This typically takes one to two hours. The first burn creates a “memory” for future burns. If you blow it out too soon, the candle will always tunnel down the center, wasting wax along the sides.
Choosing Container Sizes Wisely
Start with medium-sized containers around eight ounces. These prove easier to work with than very small or very large vessels. The wax melts and cools at a manageable pace. You’ll use less material while learning, reducing waste from practice batches.
Straight-sided containers work better than those with curves or narrow openings. The wax cools more evenly. Cleaning and reusing straight containers proves simpler too. Save uniquely shaped vessels for when you gain more experience.
Test Burn Your Creations
Always test burn your first few candles before giving them as gifts. Light the candle in a safe spot and observe how it burns. Does the flame stay steady? Does the wax melt evenly to the edges? Does smoke appear?
This testing reveals if you need to adjust wick size, pouring temperature, or fragrance amount. Taking notes during test burns helps you perfect your technique. Professional candle makers test every new recipe or container combination.
Keep Detailed Records
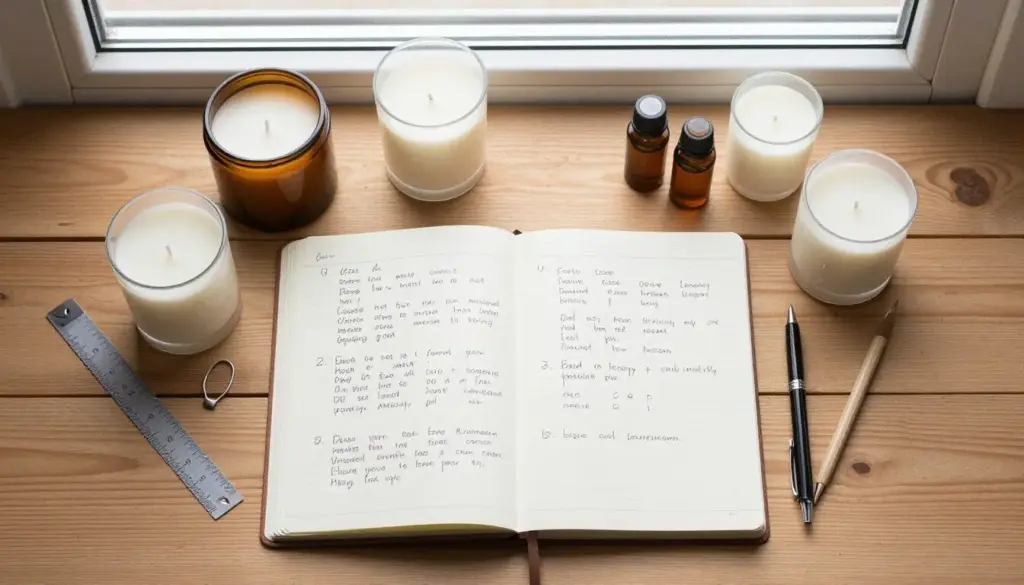
Create a simple notebook for your candle making experiments. Record the wax amount, fragrance type and quantity, container size, wick type, and any observations. Note what worked well and what you’d change next time.
When you create a candle you love, these notes let you recreate it exactly. Without records, you’ll struggle to remember the perfect recipe. Even small changes in fragrance amount or pour temperature produce different results.
Popular Scent Combinations for Homemade Candles
Blending fragrances creates unique candles that reflect your personal taste. These tried-and-tested combinations work beautifully for beginners. Each pairing balances well and produces pleasant aromas that fill your space without overwhelming.
- Lavender and vanilla (calming bedtime scent)
- Chamomile and honey (gentle, soothing aroma)
- Sandalwood and rose (warm, meditative fragrance)
- Ylang ylang and bergamot (stress-relieving blend)
Relaxing Blends
- Peppermint and eucalyptus (refreshing, clear-headed)
- Lemon and rosemary (bright, focusing scent)
- Grapefruit and ginger (uplifting morning aroma)
- Orange and cinnamon (warm, invigorating blend)
Energizing Blends
- Pine and cedar (winter forest scent)
- Vanilla and pumpkin spice (autumn comfort)
- Jasmine and gardenia (spring floral blend)
- Coconut and lime (summer beach aroma)
Seasonal Blends
Start by using equal parts of each essential oil in your blend. For example, if you’re adding ten drops total, use five drops of each scent. Once you gain experience, adjust ratios to emphasize certain notes. More lavender creates a stronger floral tone, while more vanilla adds sweetness.
Test scent combinations on paper first. Put a drop of each oil on a small piece of paper. Wave it gently to blend the aromas in the air. This quick test reveals if the combination appeals to you before committing it to wax.
Some essential oils blend more naturally than others. Citrus scents pair well together. Floral notes complement each other. Woody scents mix harmoniously. Crossing categories can work but requires more experimentation.
Explore Premium Essential Oil Sets
Discover our curated collections of pure essential oils perfect for candle making. Each set includes complementary scents with blend suggestions and usage guides. Create professional-quality fragranced candles with confidence.
Common Beginner Mistakes and How to Avoid Them
Every new candle maker encounters challenges along the way. Understanding common mistakes helps you recognize and fix issues quickly. These problems all have straightforward solutions once you know what causes them.
Overheating the Wax
Adding too much heat changes soy wax properties permanently. Overheated wax may discolor, lose its ability to hold fragrance, or develop an unpleasant odor. Always use medium microwave power and heat in short intervals. Check the temperature frequently with your thermometer.
If you accidentally overheat wax, let it cool and start with fresh wax. Don’t try to salvage severely overheated wax. The quality issues will persist in your finished candle. Prevention through careful temperature monitoring works better than attempted fixes.
Adding Fragrance at Wrong Temperature
Pouring essential oils into wax that’s too hot burns off the scent molecules. You’ll smell nothing when the candle burns. Adding fragrance to wax that’s too cool prevents proper binding. The scent separates and pools instead of distributing evenly.
The sweet spot sits between 160-170°F for most soy wax and fragrance combinations. Use your thermometer every time. Wait patiently for the wax to reach the correct temperature. This patience makes the difference between a beautifully scented candle and a disappointing one.
Using the Wrong Wick Size
A wick that’s too small creates tunneling, where the candle burns straight down the middle. This wastes wax along the sides. A wick that’s too large produces excessive flames, smoking, and rapid wax consumption. Neither situation is safe or desirable.
Match wick size to your container diameter. When in doubt, test burn a candle before making multiple copies. Observe the melt pool that forms during burning. It should reach the container edges within two hours. If it doesn’t, try a larger wick next time.
Never Add Water or Wet Ingredients
Dried herbs might look beautiful on top of candles, but they create serious fire hazards. Lavender buds, rose petals, and other botanicals can ignite when the flame reaches them. They also produce smoke and unpleasant burning smells. If you want visual interest, embed decorations in the wax sides or bottom where flames won’t reach them.
Pouring at Incorrect Temperatures
Pouring too hot causes cracking, shrinkage, and surface imperfections. Pouring too cool creates weak adhesion between wax and container, producing wet spots. It may also prevent the wax from filling details in textured containers.
Pour soy wax candles between 130-140°F for best results. This temperature range balances smooth surfaces with proper adhesion. Let your wax cool to this range even if it means waiting longer. The improved results justify the patience.
Moving Candles While Cooling
Disturbing candles during the cooling process creates uneven surfaces, cracks, and wick displacement. Once you pour your candle, leave it completely alone. Don’t touch it, move it, or peek under it. Let physics work undisturbed.
Choose your cooling location carefully before pouring. Make sure the surface is level, stable, and away from drafts. Clear the area of anything that might bump the candle. Then exercise patience while the wax sets completely.
Troubleshooting Guide for Candle Imperfections
Even experienced candle makers encounter occasional issues. Most problems don’t affect how your candle burns or smells. Understanding what’s normal versus what needs correction helps you improve your technique while maintaining realistic expectations.
Why does my soy candle have a frosty, white appearance?
Frosting is a natural characteristic of soy wax, not a defect. It appears as white crystalline patterns on the candle surface or sides. This happens because soy wax is natural and doesn’t contain additives that prevent crystallization. Frosting doesn’t affect burn quality, scent throw, or safety. Many people actually appreciate it as proof of pure, natural soy wax. If you prefer a clearer look, try using soy wax specifically formulated to reduce frosting, though this often contains small amounts of additives.
What causes wet spots on my candle sides?
Wet spots appear when wax pulls away from the glass container slightly, creating areas that look darker or oily. This purely cosmetic issue happens due to temperature changes during cooling or differences in cooling rates between the wax and glass. Wet spots don’t affect how the candle burns. To minimize them, try pouring at slightly higher temperatures around 140°F, preheating your containers in a warm oven, or using containers at room temperature rather than cold ones.
How do I fix sink holes around the wick?
Sink holes form as wax cools and contracts around the wick. This happens completely naturally. To fix them, wait until your candle cools completely and hardens fully. Save some melted wax from your original batch. Reheat this reserved wax to about 160°F. Carefully pour just enough to fill the depression. Let this second layer cool as well. The fix creates a smooth, level top surface. Some candle makers embrace sink holes as part of the handmade charm.
Why is my candle tunneling when it burns?
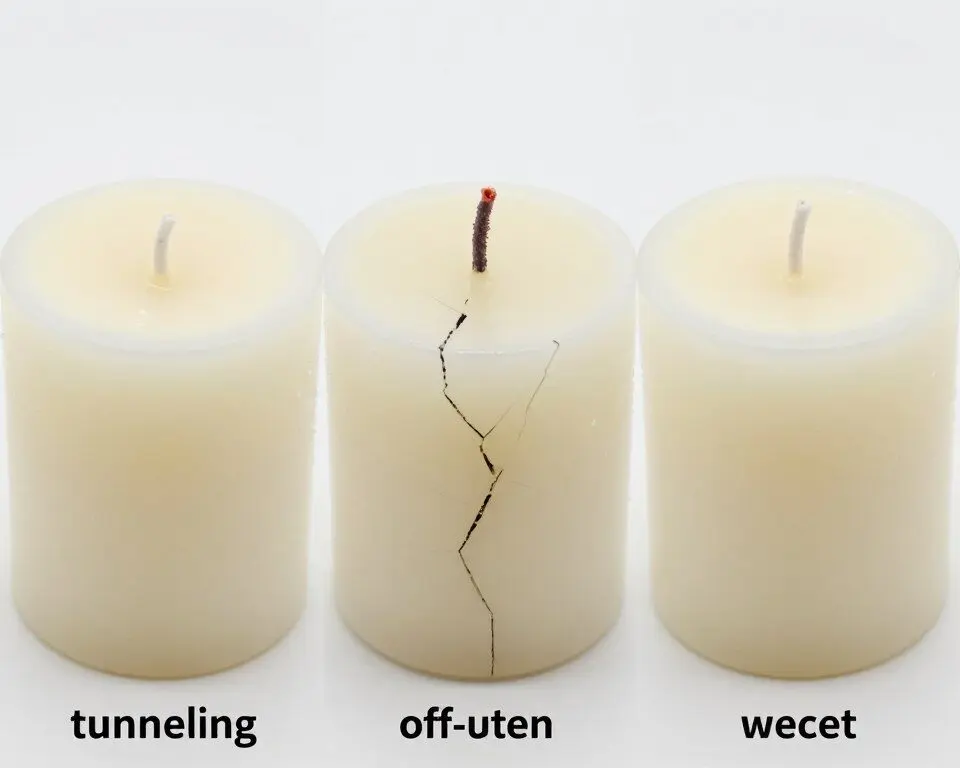
Tunneling means the candle burns straight down the center, leaving wax on the sides. This happens for two main reasons. First, the wick might be too small for the container diameter. Second, you might not have burned the candle long enough during the first use. The first burn must melt the entire top surface to the edges. This creates a memory for future burns. If tunneling already started, burn the candle for longer periods to melt the remaining wax. For future candles, use a larger wick or ensure proper first burn.
What makes candles crack on top?
Cracks usually indicate the wax was too hot when poured. High pouring temperatures cause the top to cool and harden much faster than the bottom. As the lower layers cool and contract, they pull on the hardened top, creating cracks. Pour at the recommended temperature of 130-140°F to prevent this. Rapid cooling from drafts or cold surfaces also causes cracks. Make sure your cooling area has stable temperature and no air movement.
Reusing and Repurposing Candle Wax
Old candles and leftover wax don’t need to go to waste. Repurposing wax proves economical and environmentally friendly. This practice also lets you salvage expensive candles that didn’t burn properly or combine small amounts of wax into new creations.
Salvaging Wax from Old Candles
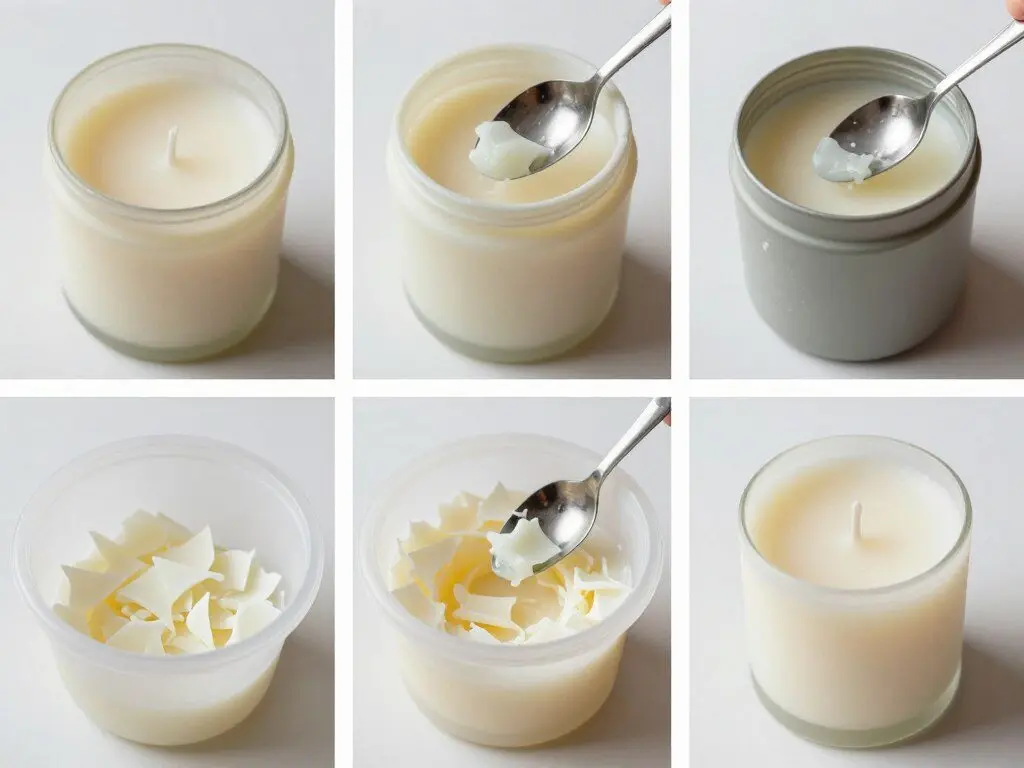
Many store-bought candles leave significant wax in the bottom when the wick burns out. You can rescue this wax and give it new life. Start by softening the remaining wax. If the container is microwave-safe, heat it in twenty-second intervals until the wax loosens.
For non-microwavable containers, place them in warm water. Let them sit until the wax softens enough to scoop out. Use a metal spoon to dig out the softened wax. Collect it in a heat-safe container for later use.
This process gets messy, but your hands receive a spa-like treatment from all the wax. Keep paper towels handy. Work over newspaper or a protected surface. Don’t worry about small black residue from old wicks. You can strain this out or use opaque containers that hide imperfections.
Combining Leftover Wax
Small amounts of wax left from various projects can combine into new candles. Try to match similar wax types together. Soy wax works with soy wax. Paraffin blends with paraffin. Mixing different wax types may work but can produce unpredictable results.
Be thoughtful about scent combinations when mixing old wax. Lavender and vanilla blend beautifully. Peppermint and cinnamon create interesting contrasts. Random scent combinations might clash. When in doubt, use recycled wax in containers where you won’t be too particular about fragrance.
Melt your collected wax pieces together. Add fresh fragrance if desired since old scents may have weakened. The recycled wax might appear slightly off-white or have visible imperfections. Choose colored or opaque containers that hide these cosmetic issues.
Creative Uses for Wax Scraps
Even tiny wax bits have uses beyond candle making. Create wax melts for electric warmers by pouring small amounts into silicone molds. Make fire starters for camping by coating pinecones or cotton balls in melted wax. Rub wax on squeaky drawers or sticky windows to lubricate them naturally.
Store wax scraps in a dedicated container. When you accumulate enough, transform them into a new project. This sustainable approach reduces waste and maximizes your candle making investment.
Creating Candles as Thoughtful Gifts
Homemade candles make wonderfully personal gifts for any occasion. The time and care you invest shows recipients how much you value them. Custom scents, unique containers, and beautiful presentation transform simple candles into cherished presents.
Personalizing Candles for Recipients
Consider the recipient’s preferences when choosing scents. Does your friend love lavender? Make a relaxing lavender-vanilla blend. Is your sister energized by citrus? Try a lemon-rosemary combination. Personal touches demonstrate thoughtfulness beyond generic store-bought gifts.
Container selection offers another personalization opportunity. Vintage teacups suit someone who loves antiques. Modern geometric vessels appeal to contemporary design enthusiasts. Mason jars work for farmhouse style lovers. The container itself becomes a gift they’ll reuse long after the candle burns down.
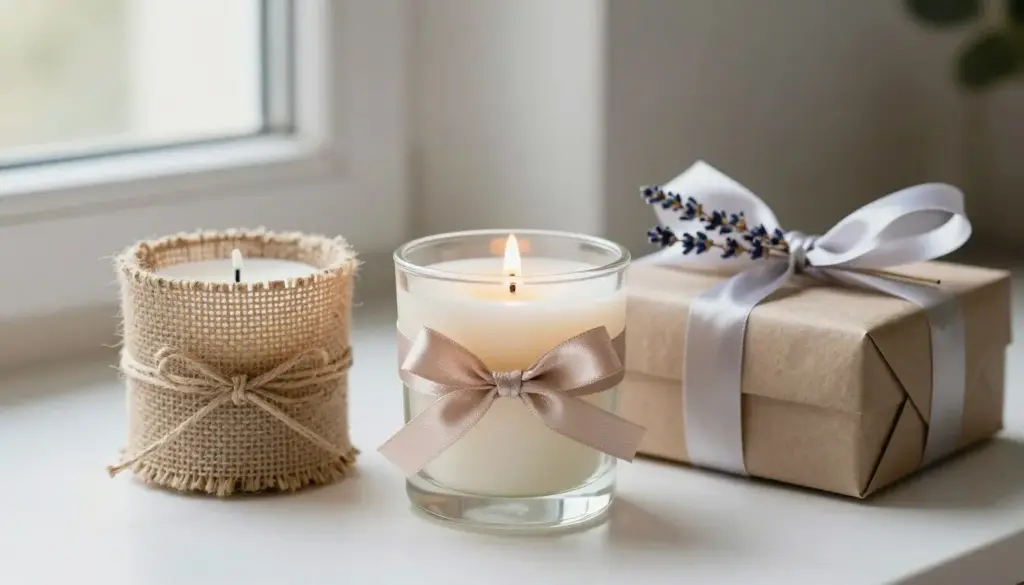
Add decorative elements that reflect the recipient’s interests. Tie the candle with their favorite color ribbon. Attach a meaningful charm. Create a custom label with their name or a special message. These small details elevate your gift from nice to unforgettable.
Presentation Ideas
Beautiful presentation enhances your handmade gift. Wrap the candle in tissue paper secured with twine. Place it in a small gift box lined with crinkled paper. Add dried flowers, cinnamon sticks, or other natural elements that complement the scent.
Create a gift set by pairing your candle with matches, a wick trimmer, or a candle coaster. Bundle several small candles together for a collection. Present the candle alongside other handmade items like soap or bath salts for a complete spa experience.
Include care instructions on a small card. Explain how to get the best burn from their new candle. Mention the scent notes you included. Share when you made it. These personal touches show the care and effort behind your creation.
Timing Your Candle Making for Gifts
Start making gift candles at least one week before you need them. This allows proper curing time for the best scent throw. It also gives you buffer room if something goes wrong with a batch. Rushing candles for last-minute gifts often leads to mistakes.
Consider making candles in batches for multiple recipients. You can create several candles at once with little extra effort. This efficiency helps when making holiday gifts or party favors. Keep detailed notes so you can recreate popular combinations.
Gift-Giving Pro Tip: Make a few extra candles beyond what you need for gifts. This gives you backups in case of issues. Extra candles also work perfectly as last-minute gifts when unexpected occasions arise. Store finished candles in a cool, dark place until needed.
Storing Supplies and Caring for Finished Candles
Proper storage extends the life of both your candle making supplies and finished candles. Taking care of materials and creations ensures consistent quality and prevents waste. These storage practices keep everything in optimal condition between projects.
Storing Candle Making Supplies
Keep soy wax flakes in their original bag or transfer them to an airtight container. Store them in a cool, dry place away from direct sunlight. Heat and light can degrade wax quality over time. A pantry or closet works perfectly for wax storage.
Essential oils and fragrance oils need dark, cool storage. Heat and light break down the aromatic compounds. Keep bottles tightly sealed between uses. Store them upright to prevent leaking. A dedicated box or drawer protects oils from temperature fluctuations.
Organize wicks by size in labeled containers or bags. This prevents confusion when starting new projects. Keep extra metal tabs with your wicks. Store all your tools together in one designated area for easy access.
Caring for Finished Candles
Finished candles benefit from proper curing before use or gifting. Let candles rest for at least twenty-four hours after making them. This allows the fragrance to distribute fully and the wax to reach maximum hardness. Some candle makers prefer waiting three to seven days for optimal results.
Store finished candles in a cool location away from direct sunlight. Heat can soften wax and alter shapes. Sunlight fades colors and weakens fragrances over time. Wrap candles individually in tissue paper if stacking them to prevent surface scratches.
Keep scented candles covered when not in use. This preserves the fragrance longer. A simple lid or piece of aluminum foil over the top works well. Dust accumulation on candle surfaces also decreases with covered storage.
Candle Burning Best Practices
Educate candle recipients about proper burning for maximum enjoyment. Trim wicks to one-quarter inch before each use. This prevents smoking and ensures even burning. Burn candles long enough to melt the entire top surface to the edges. This typically requires one to two hours.
Never burn candles for more than four hours at a time. Extended burning overheats the container and can degrade the wax quality. Always burn candles on heat-resistant surfaces away from drafts, curtains, and flammable materials. Never leave burning candles unattended.
When only half an inch of wax remains at the bottom, discontinue use. Burning candles too low creates excessive heat that can crack containers. Save the remaining wax for recycling into new candles.
Exploring Advanced Candle Making Techniques
Once you master basic candle making, new techniques expand your creative possibilities. These advanced methods let you create unique effects and more complex designs. Start experimenting after you feel comfortable with the fundamental process.
Creating Layered Candles
Layered candles feature distinct colored or scented sections stacked vertically. To create layers, pour your first layer and let it harden completely before adding the next. Each layer needs different temperatures and timing. The process requires patience but produces stunning visual effects.
Pour the bottom layer first at standard temperature. Let it cool until firm but still slightly warm to the touch. Pour the next layer at a slightly lower temperature to prevent the layers from melting together. Repeat for additional layers. Each section can feature different colors or scents.
Tilting your container while the first layer hardens creates diagonal layers. Secure the container at an angle with props or holders. Once the first layer sets, level the container and add the second layer. This technique produces dramatic geometric effects.
Embedding Objects
Carefully chosen decorative elements add visual interest to candles. Embed dried flowers, coffee beans, or citrus slices in the wax sides where flames won’t reach them. Pour a thin layer of wax first. Press decorations against the container sides. Pour remaining wax carefully to hold them in place.
Never place anything in the candle’s center where the flame will burn. All embedded items must stay away from the wick path. This safety precaution prevents fire hazards while still allowing creative expression.
Working with Molds
Pillar candles and shaped candles require special molds. Silicone molds work wonderfully because they flex for easy removal. Metal and plastic molds need release spray or oil. The wax must be harder than container candle wax to maintain shape without container support.
Temperature control becomes even more critical with molds. Pour at the manufacturer’s recommended temperature. Cool molds slowly and evenly. Rushing the process causes cracks or weak spots. Insert wicks using different techniques than container candles, often through the mold bottom with special threading tools.
Creating Marbled Effects
Marbling produces swirled color patterns throughout your candle. Add different colored wax layers and use a skewer to gently swirl them together before they fully harden. The technique requires perfect timing when the wax is partially set but still movable.
Another marbling method involves pouring thin streams of different colored wax simultaneously. The colors naturally swirl together as they fall into the container. Practice this technique with similar colored waxes before attempting high-contrast combinations.
Taking Your Skills Further
Advanced candle making opens doors to selling your creations, teaching workshops, or simply enjoying more complex projects. Many successful candle businesses started from kitchen table experiments. Focus on perfecting your basics before investing heavily in advanced equipment or techniques.
Sustainable and Eco-Friendly Candle Making
Making candles at home already supports sustainability by reducing packaging waste and transportation emissions. Taking additional eco-friendly steps aligns your hobby with environmental values. Small changes make your candle making practice even more earth-conscious.
Choosing Natural Materials
Soy wax comes from renewable resources and biodegrades naturally. It produces less soot than paraffin wax, improving indoor air quality. Look for soy wax from sustainably managed farms when possible. Some suppliers provide organic or non-GMO options for the most environmentally conscious choice.
Cotton wicks burn cleanly without releasing harmful chemicals. Avoid wicks containing lead or metal cores beyond the base tab. Wooden wicks offer another natural option that creates pleasant crackling sounds while burning. These sustainable wick choices protect both air quality and health.
Essential oils derived from plants provide natural fragrance without synthetic chemicals. Choose oils from companies practicing sustainable harvesting. Organic essential oils cost more but align with eco-friendly values. They also come from crops grown without pesticides or harmful chemicals.
Reusing and Recycling Containers
Transform glass jars from the kitchen into candle containers. Cleaned jam jars, salsa containers, and pickle jars work beautifully. Thrift stores offer inexpensive vintage vessels perfect for candle making. Reusing containers saves money and reduces demand for new glass production.
When candles burn down completely, clean the containers for reuse. Pour hot water into empty jars to melt remaining wax. The wax floats to the top where you can easily remove it. Wash with hot soapy water. These containers begin their next life as storage, planters, or new candles.
Reducing Waste
Save every bit of wax for reuse. Scraps from trimming, leftover melted wax, and partial candles all have value. Combining them creates unique one-of-a-kind candles. This zero-waste approach maximizes your materials while minimizing environmental impact.
Buy supplies in bulk when possible to reduce packaging waste. Larger containers of wax flakes and fragrance oils create less trash than multiple small packages. Share supplies with friends who also make candles. This community approach reduces individual waste and shipping impacts.
Choose suppliers committed to sustainability. Companies using recyclable packaging, carbon-neutral shipping, or renewable energy deserve support. Research brands before purchasing to ensure your money supports ethical practices.
Ready to Begin Your Candle Making Journey
You now have all the knowledge needed to start making beautiful candles at home. From understanding materials to mastering techniques, you’re prepared to create candles that fill your space with warmth and fragrance. The only thing left is taking that first step.
Start simple with one or two basic candles. Don’t pressure yourself to create perfection immediately. Every candle maker experiences learning curves and unexpected results. Each batch teaches valuable lessons that improve your next creations.
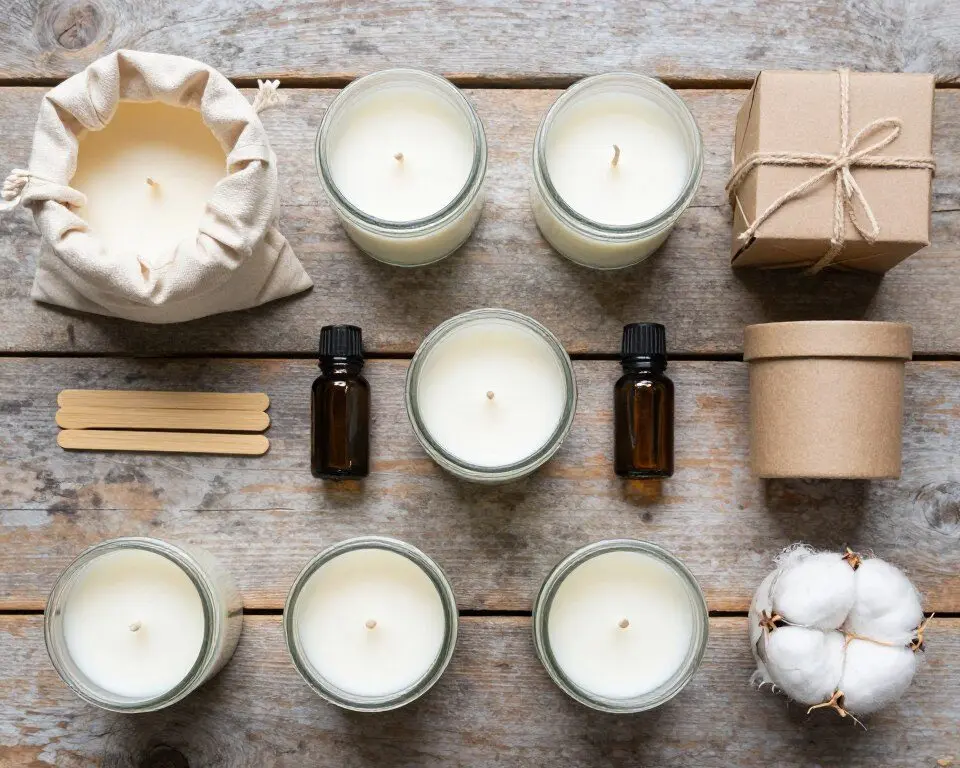
Gather your essential supplies first. You need soy wax flakes, cotton wicks, essential oils, containers, and basic tools. Having everything ready before you begin prevents mid-project frustration. Organization makes the process smoother and more enjoyable.
Set aside dedicated time for your first candle making session. Rushing leads to mistakes. Allow three to four hours including cooling time. Create a calm, focused environment where you can work undisturbed. Put on comfortable clothes you don’t mind getting waxy.
Begin Your Candle Making Adventure Today
Everything you need in one convenient package. Our Complete Beginner’s Candle Making Kit includes premium soy wax, natural cotton wicks, essential oil collection, glass containers, thermometer, and step-by-step guide. Skip the guesswork and start creating beautiful candles right away.
Remember that candle making combines science with art. Follow temperature guidelines and measurements precisely for consistent results. Then let your creativity flow through scent combinations, container choices, and decorative touches. This balance between precision and artistry makes candle making endlessly rewarding.
Join online communities of candle makers to share experiences, ask questions, and find inspiration. Social media groups and forums provide supportive spaces for beginners. Seeing others’ creations sparks new ideas while their challenges remind you that everyone starts somewhere.
Document your journey with photos and notes. Track what works and what needs adjustment. Your first candle might not be perfect, but it represents the beginning of a fulfilling craft. Each subsequent candle builds your skills and confidence.
The satisfaction of lighting a candle you created yourself surpasses any store-bought option. That flickering flame represents your time, creativity, and care. It transforms your space while bringing deep personal pride. This simple pleasure makes candle making worth every moment invested.
Final Thoughts on Candle Making at Home for Beginners
Candle making at home for beginners offers an accessible, rewarding craft that anyone can master. With basic materials, simple tools, and patience, you create beautiful candles that enhance your living space or delight gift recipients. The process itself provides therapeutic benefits while producing practical, lovely results.
This ancient craft adapts perfectly to modern life. Natural soy wax and essential oils create clean-burning candles free from harsh chemicals. Recycled containers and sustainable practices align candle making with eco-conscious values. The flexibility to customize every aspect means your candles truly reflect your personal style.
Start today with confidence knowing you have comprehensive guidance at your fingertips. Gather your supplies, follow the step-by-step instructions, and enjoy watching raw materials transform into glowing works of art. Your candle making journey begins with a single batch and grows into a lifelong creative outlet.
The warm glow of handmade candles brings comfort and joy to any home. Whether crafting for yourself, friends, or family, each candle carries the special quality of being made with care and intention. Welcome to the wonderful world of candle making.