Imagine biting into a warm, flaky croissant fresh from your own oven. The buttery layers crack gently as you pull them apart. The aroma fills your kitchen with the scent of a French bakery.
For years, home bakers believed croissants were too complicated to make. The truth is different. With the right approach, anyone can create bakery-quality croissants at home.
This simplified croissant recipe breaks down the process into manageable steps. You will learn techniques that professional bakers use. The method eliminates unnecessary complexity while preserving authentic flavor and texture.

As an Amazon Associate, I earn from qualifying purchases. This helps support the free content on this site at no cost to you.
Free Download: Croissant Mastery Guide
Get my exclusive 10-page guide with professional tips for perfect croissant layers every time. Learn the secrets that bakeries don’t share.
What Makes a Perfect Croissant
A croissant is a laminated pastry that originated in France. The word means crescent in French. This pastry features dozens of paper-thin layers of dough and butter.
When baked properly, the butter creates steam between each layer. This steam causes the dough to puff dramatically. The result is an incredibly light texture with a crispy exterior.
The flavor profile combines subtle sweetness with rich butteriness. A hint of yeast adds depth and complexity. The texture should be crispy on the outside and tender inside.
Traditional Croissant Characteristics
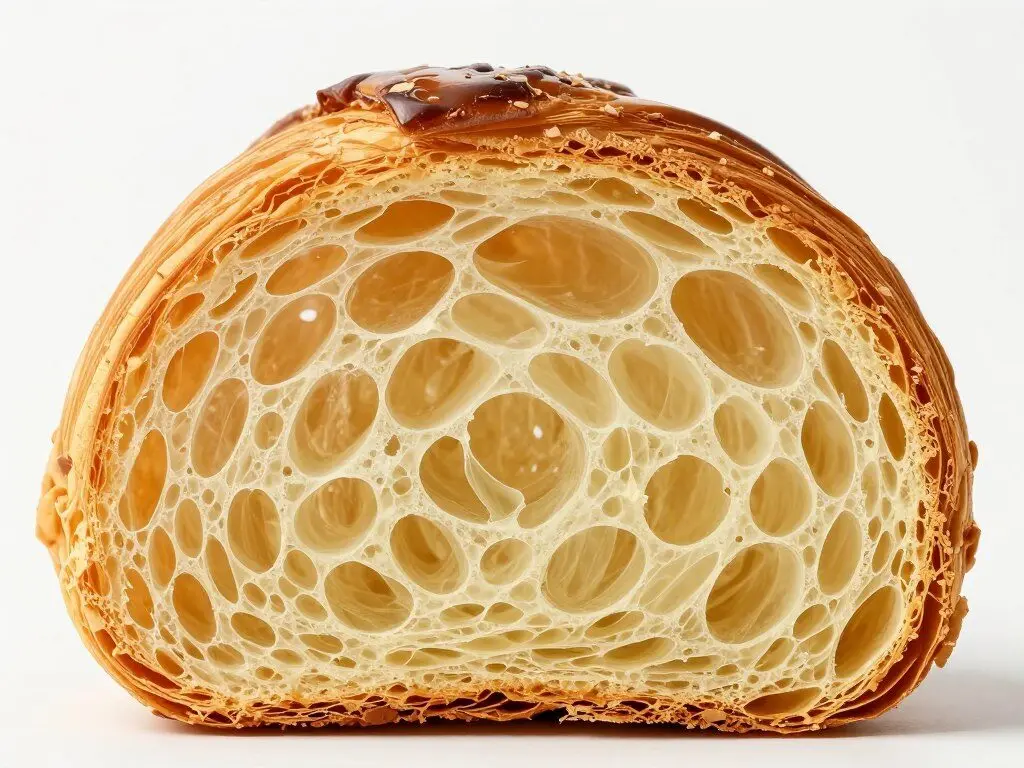
- Honeycomb interior structure with visible air pockets
- Golden brown exterior with slight sheen
- Crispy outer layers that shatter when bitten
- Buttery aroma that fills the room
- Tender but structured crumb
Common Croissant Mistakes
- Butter leaking during baking from improper temperature
- Dense texture from insufficient layering
- Pale color from inadequate egg wash
- Doughy center from underbaking
- Flat shape from overproofing
Understanding these fundamentals helps you recognize when your croissant dough is developing correctly. You will know what to look for at each stage of the process.
Croissant Recipe Compared to Other Pastries
Many bakers confuse croissants with similar pastries. Understanding the differences helps you master the croissant recipe technique.
Croissants vs Puff Pastry
Puff pastry contains only flour, butter, water, and salt. It has no sugar or yeast. The dough relies entirely on butter for leavening.
Croissants include milk, sugar, and active yeast. The yeast provides additional rise and creates a slightly chewy texture. Sugar adds sweetness and promotes browning.
Both use lamination techniques. However, croissants require less folding than traditional puff pastry. The yeast compensates for fewer layers.
Croissants vs Danish Pastry
Danish dough is the closest relative to croissant dough. The main difference is eggs. Danish pastry includes eggs in the dough itself.
The eggs make Danish pastry richer and more cake-like. Croissants have a lighter, more bread-like quality. Both use similar lamination methods.
Danish pastries often contain fillings and toppings. Traditional croissants are enjoyed plain or with simple additions like chocolate or almond paste.
| Pastry Type | Contains Yeast | Contains Eggs | Contains Sugar | Liquid Used | Texture |
| Croissant | Yes | No | Yes | Milk | Light, flaky, slightly chewy |
| Puff Pastry | No | No | No | Water | Crispy, flaky, neutral |
| Danish | Yes | Yes | Yes | Milk | Rich, tender, cake-like |
This croissant recipe simplifies the traditional method while maintaining authentic results. You get all the flavor and texture without excessive complexity.
Essential Ingredients for Your Croissant Recipe
Quality ingredients make the difference between good and exceptional croissants. Each component plays a specific role in creating those signature flaky layers.
All-Purpose Flour
Standard all-purpose flour works perfectly for this croissant recipe. The protein content provides enough structure without making the dough tough.
Measure flour correctly by spooning it into the measuring cup. Level it off with a knife edge. Scooping directly from the bag packs the flour and adds too much.
Alternatively, weigh your flour for precision. Four cups equals approximately 500 grams. A kitchen scale eliminates measuring errors.
Granulated Sugar
White granulated sugar serves multiple purposes in croissant dough. It feeds the yeast during proofing. It adds subtle sweetness to balance the butter.
Sugar also promotes beautiful golden brown color during baking. The caramelization creates that appetizing appearance. One-third cup provides the right balance.
Active Dry Yeast
Active dry yeast creates the rise in croissant dough. Unlike puff pastry, croissants rely partly on yeast for their airy texture.
You can substitute instant yeast if needed. Use the same amount. Instant yeast may reduce rising time by ten to fifteen minutes.
Store yeast in the refrigerator after opening. Check the expiration date before using. Old yeast loses effectiveness and produces flat croissants.
Kosher Salt
Salt controls yeast activity and enhances flavor. It makes the buttery taste more pronounced. Use kosher salt for its pure flavor and easy measuring.
If using table salt, reduce the amount slightly. Table salt is finer and more concentrated. Two teaspoons of table salt equals about two and one-quarter teaspoons of kosher salt.
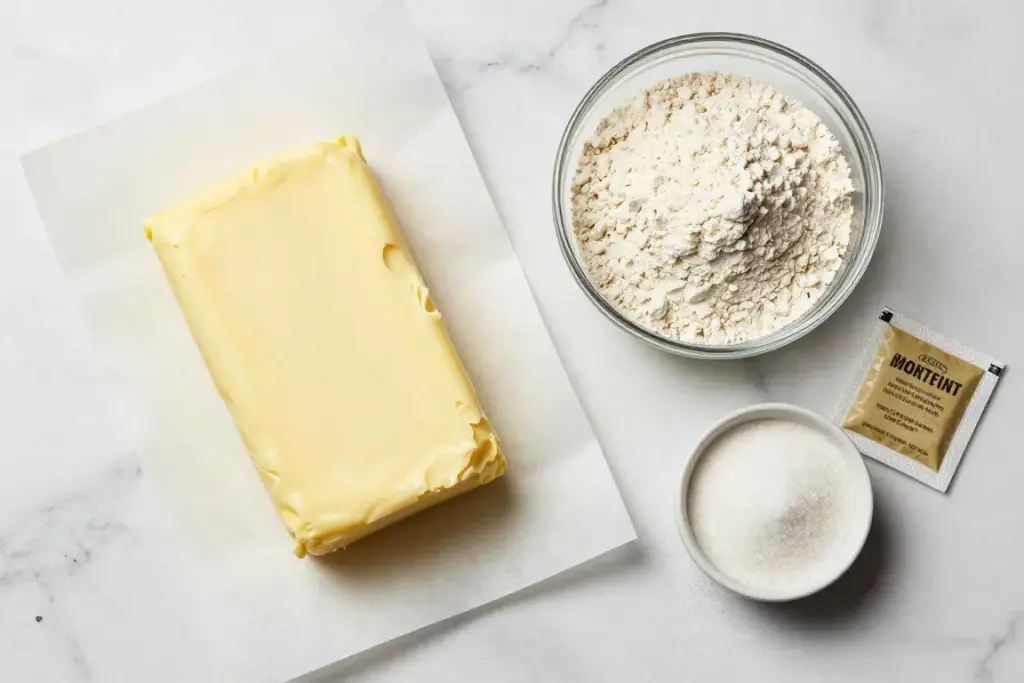
Unsalted Butter
Butter is the star ingredient in any croissant recipe. Use high-quality unsalted butter for best results. European-style butter with higher fat content creates even flakier layers.
The butter must stay cold throughout the process. Cold butter creates distinct layers rather than blending into the dough. Keep extra butter refrigerated until needed.
You need one and one-quarter cups or two and one-half sticks. Slice it thin before adding to the flour mixture. This distributes butter evenly throughout the dough.
Whole Milk
Milk provides moisture and richness to the croissant dough. Use whatever milk you have available. Whole milk creates the richest flavor. Lower-fat milk also works.
Plant-based milk can substitute for dairy milk. The flavor will differ slightly. The texture remains similar. Oat milk or soy milk work best for baking.
The milk should be cold when added to the flour mixture. This keeps the butter from softening prematurely. One cup is approximately the right amount. You may need slightly more or less.
The dough should form a stiff ball. It should not be wet or sticky. It should pull cleanly from the bowl sides. Add milk gradually and stop when the consistency is right.
Egg Wash
Egg wash is not part of the dough butter mixture. You apply it just before baking. Beat one large egg with a teaspoon or two of water.
This creates the shiny golden surface on baked croissants. Brush it gently over the shaped dough. Avoid pooling in the crevices.
Tools and Equipment for Making Croissants
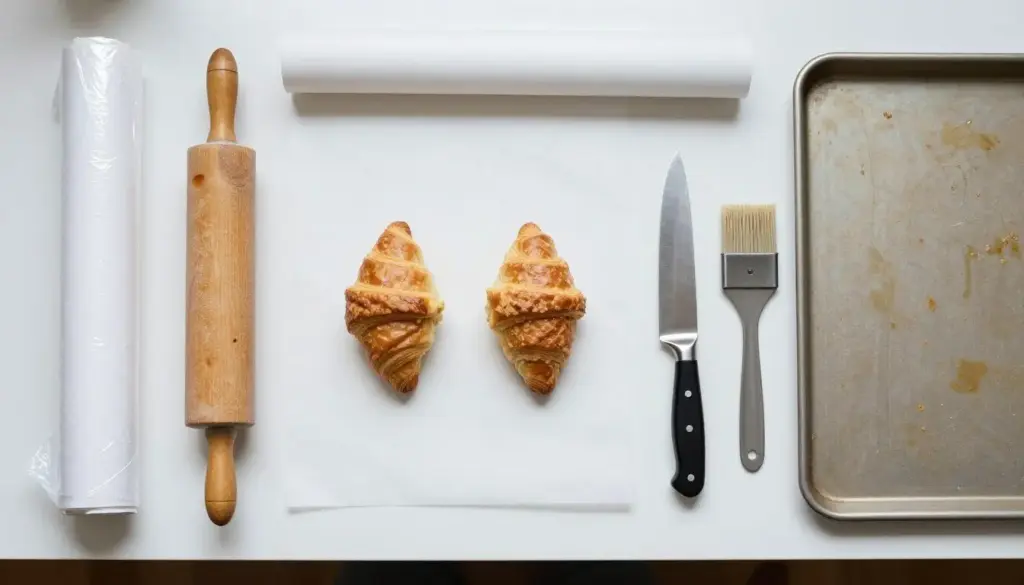
Having the right tools makes the croissant-making process easier. You do not need specialized equipment. Most items are standard kitchen tools.
Mixing Bowl
A large mixing bowl is essential for combining ingredients. Glass or stainless steel works best. The bowl should hold at least three quarts.
You will mix the flour, sugar, yeast, salt, butter, and milk in this bowl. A wide opening makes stirring easier. Choose a bowl with a flat bottom for stability.
Rolling Pin
A good rolling pin is crucial for laminating croissant dough. French-style rolling pins without handles work well. They give you more control over pressure.
Standard rolling pins with handles also work fine. Choose one that is at least twelve inches long. Longer rolling pins make working with large dough rectangles easier.
A marble or wooden rolling pin both work well. Some bakers prefer chilled marble rolling pins. The cold surface helps keep butter from softening.
Plastic Wrap
Plastic wrap is essential for chilling the dough between steps. Wrap the dough tightly to prevent drying. The plastic keeps the surface moist during refrigeration.
You will use plastic wrap multiple times. Keep a roll handy. Reusable plastic storage bags also work for wrapping dough.
When covering shaped croissants during proofing, lightly grease the plastic wrap first. This prevents sticking to the rising dough.
Parchment Paper
Line your baking sheet with parchment paper before placing shaped croissants. This prevents sticking and promotes even browning.
Parchment paper also makes cleanup easier. You can reuse the same sheet for multiple batches. Silicone baking mats work equally well.
Cut parchment paper to fit your baking sheet exactly. Overhanging edges can burn in a hot oven.
Sharp Knife or Pizza Cutter
You need a sharp blade for cutting the dough into triangles. A pizza cutter works exceptionally well. It glides through the dough cleanly.
A sharp chef’s knife also works. Make sure the blade is very sharp. Dull knives drag through the dough and distort the layers.
Clean the blade between cuts. Bits of dough can stick and create uneven edges.
Pastry Brush
A pastry brush applies egg wash to the shaped croissants. Silicone brushes clean easier than natural bristle brushes. Either type works well.
Choose a brush that is about one to two inches wide. This covers the croissant surface quickly without being unwieldy.
Baking Sheet
You need at least two large baking sheets. Rimmed sheet pans work best. The rim prevents anything from sliding off.
Half-sheet pans measuring about eighteen by thirteen inches are ideal. They fit most home ovens comfortably. The large surface holds multiple croissants with space between.
Light-colored baking sheets promote even browning. Dark pans can over-brown the bottoms of your croissants.
How to Make Croissant Dough Step by Step
This simplified method eliminates the traditional butter block. Instead, you incorporate thin butter slices directly into the flour. This saves time while creating equally flaky layers.
Mixing the Dough
Start by combining dry ingredients in your large mixing bowl. Add four cups of all-purpose flour. Measure one-third cup of granulated sugar. Add four teaspoons of active dry yeast.
Include two and one-quarter teaspoons of kosher salt. Whisk these ingredients together thoroughly. This distributes the yeast and salt evenly throughout the flour.
Take your cold unsalted butter from the refrigerator. Slice it into very thin pieces. Aim for slices about one-eighth inch thick. Add these butter slices to the flour mixture.
Toss the butter pieces in the flour. Coat every slice completely. This flour coating prevents the butter from clumping together. It helps maintain distinct butter layers.
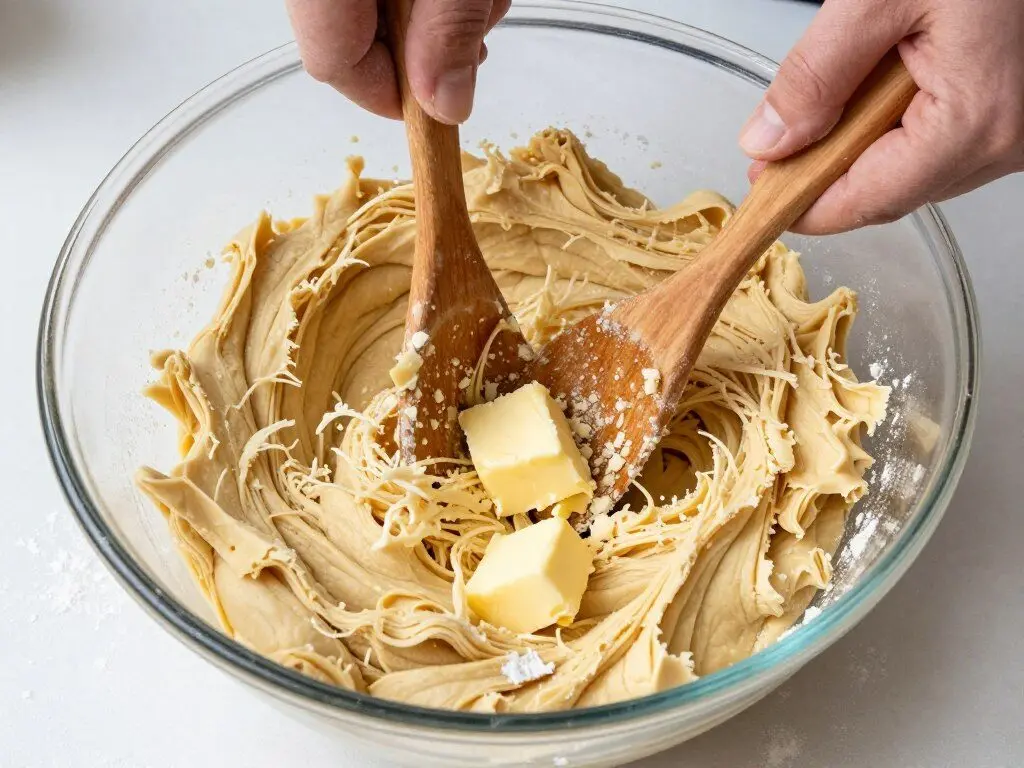
Pour in one cup of cold milk. Start stirring with a wooden spoon or silicone spatula. Do not use an electric mixer. A mixer would break up the butter pieces too much.
Fold the ingredients together gently. The dough will look shaggy at first. Keep folding until it forms a cohesive ball. The dough should pull away from the bowl sides cleanly.
The consistency should be stiff, not wet. You may need slightly more or less milk than one cup. Add milk gradually. Stop when the dough holds together without being sticky.
First Chill
Wrap the dough ball tightly in plastic wrap. Make sure no part of the dough is exposed. Exposed dough develops a dry skin during refrigeration.
Place the wrapped dough in the refrigerator. Let it chill for one full hour. This initial rest serves several purposes.
The cold temperature firms up the butter pieces. Cold butter creates distinct layers during rolling. The rest also allows the flour to hydrate fully. The gluten relaxes, making the dough easier to roll.
Do not skip this chilling time. Room temperature butter will melt into the dough during rolling. You will lose the layered structure that makes croissants flaky.
Laminating the Dough for Flaky Layers
Lamination creates the signature flaky texture in croissants. This process involves repeatedly rolling and folding the dough. Each fold multiplies the number of butter and dough layers.
Understanding Lamination
Traditional croissant recipes require precise measurements. They demand exact fold counts. This can intimidate home bakers and discourage them from trying.
This simplified approach is more intuitive. You roll and fold until the dough looks right. You will see large butter streaks throughout. The dough will become smooth and flat.
The goal is creating thin, even layers of butter distributed through the dough. When baked, these butter layers create steam. The steam pushes the dough layers apart, creating height and flakiness.
Rolling and Folding Technique
Remove the chilled dough from the refrigerator. Unwrap it and place it on a lightly floured surface. Sprinkle just enough flour to prevent sticking.
Use your rolling pin to begin flattening the dough. Apply even pressure. Work from the center outward. Encourage the dough into a rectangle shape as you roll.
Do not worry about perfect dimensions initially. The dough will be lumpy and irregular at first. This is normal. The butter pieces create bumps under the surface.
Roll the dough into a long rectangle approximately three times longer than it is wide. The exact size does not matter. Focus on creating a rectangular shape.
Fold the rectangle into thirds like folding a business letter. Bring one short end to the center. Fold the opposite end over the top. You now have three layers.
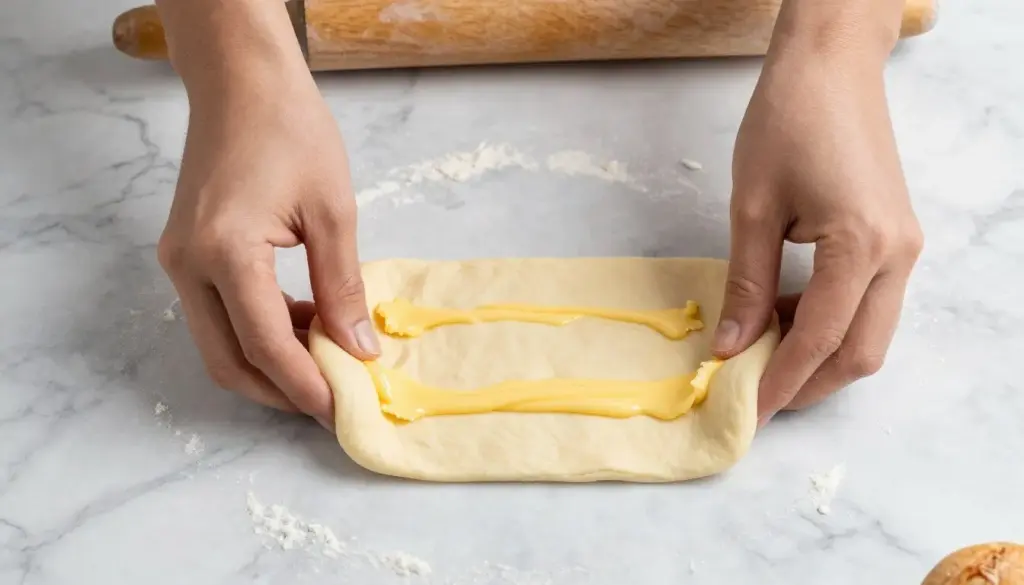
Turn the folded dough ninety degrees. This is important. Turning ensures you roll in a different direction each time. This creates a more even distribution of layers.
Roll out the dough again into a long rectangle. Fold it into thirds again. Turn ninety degrees. Repeat this process.
Continue rolling, folding, and turning. Do this three to five more times total. You want four to six folds altogether.
Recognizing Proper Lamination
Watch the dough as you work. Initially, it will be very bumpy. Large chunks of butter create uneven surfaces. The dough tears easily.
With each roll and fold, the dough becomes smoother. The butter spreads into thinner sheets. The surface becomes more uniform.
You are finished when the dough is smooth and flat. You should see large streaks of butter running throughout. The dough should not have rough bumps or thick butter chunks.
The butter should be visible as thin layers, not thick pieces. The dough should roll easily without excessive tearing. It should feel pliable but still cold.
Temperature Management
Temperature control is absolutely critical during lamination. The butter must stay cold and firm. Soft butter will blend into the dough instead of forming layers.
Work as quickly as you can while maintaining good technique. If you notice the dough becoming warm, stop immediately. Wrap it in plastic wrap and refrigerate.
Chill the dough until the butter feels stiff again. This might take fifteen to thirty minutes. Then resume rolling and folding.
Your hands and the room temperature affect the dough. On hot days, chill more frequently. Some bakers chill the dough between every single fold. This is perfectly acceptable.
A lightly floured surface prevents sticking. However, use flour sparingly. Too much flour makes the dough dry. Brush off excess flour before folding.
Chilling and Shaping Your Croissants
Second Chill Period
After completing the lamination process, wrap the dough tightly in plastic wrap again. Return it to the refrigerator for one more hour of chilling.
This second rest is essential. The gluten developed during rolling needs time to relax. Relaxed gluten makes the dough easier to roll thin. The butter also needs to firm up completely.
Well-chilled dough cuts cleanly into triangles. It maintains its shape during the final roll. Warm dough tears and stretches unevenly.
Dividing the Dough
Remove the chilled dough from the refrigerator. Unwrap it and place it on your lightly floured surface. Cut the dough in half using a sharp knife.
Working with half the dough at a time makes the process more manageable. The pieces are easier to roll out. They fit better on your work surface.
Return one half to the refrigerator while you work with the other. This keeps it cold until you are ready.
Rolling to Final Thickness
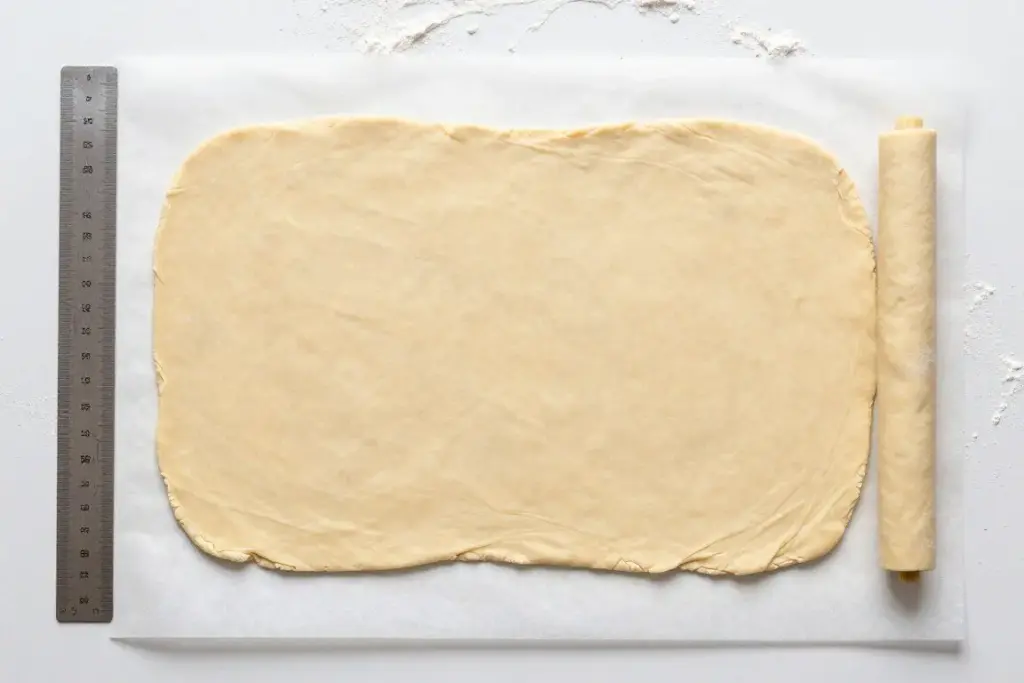
Roll the dough half into a large rectangle. Aim for about one-eighth inch thickness. This creates croissants with enough layers to be flaky but not so many that they become dense.
The rectangle should measure approximately ten inches wide and twenty-two inches long. These are not strict requirements. Focus on achieving even thickness throughout.
Use your rolling pin to roll from the center outward. Rotate the dough occasionally. This ensures even thickness. Flip the dough over once or twice during rolling.
Check thickness by looking at the edge. The dough should be thin enough to see light through it when held up. But not so thin that it tears easily.
Cutting the Triangles
Trim the uneven edges from your rectangle using a sharp knife or pizza cutter. Save the scraps. You can bake them as irregular treats or add them to the second batch.
Cut the rectangle lengthwise down the center. This creates two long strips approximately five inches wide each.
Mark points along the top and bottom edges. Space them about five inches apart. These marks guide your diagonal cuts.
Cut diagonally from top mark to bottom mark. This creates long, skinny triangles. Each triangle should have a base about five inches wide.
The triangles do not need to be perfectly identical. Slight variations in size are acceptable. Consistency in thickness matters more than perfect dimensions.
Notching and Rolling
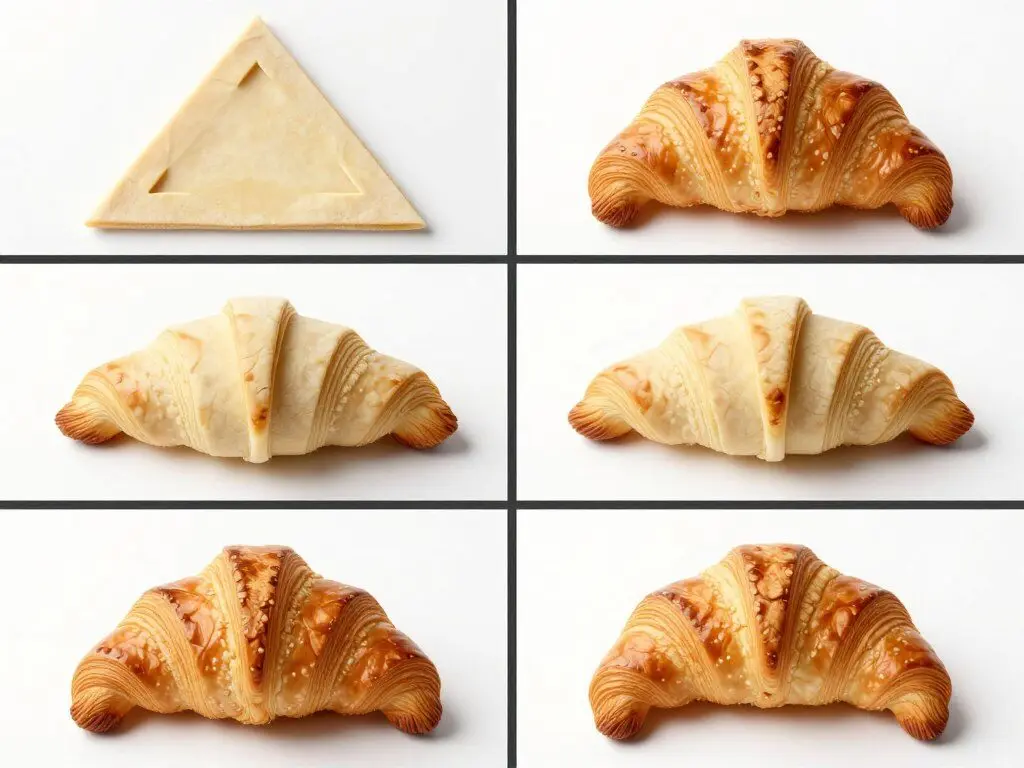
Make a small cut at the wide base of each triangle. The notch should be about one-half inch deep. Cut straight into the center of the base.
This notch serves an important purpose. It helps the croissant curve into the classic crescent shape. The two resulting tabs will form the endpoints.
Place the triangle with the point facing away from you. The wide notched end should be closest to you. Gently pull the two tabs created by the notch slightly apart.
Begin rolling from the wide end toward the point. Roll gently but firmly. Do not pull or stretch the dough. Let it naturally curl as you roll.
The dough should wrap around itself two to three times. Tuck the pointed end underneath the croissant. This prevents it from unraveling during proofing and baking.
Curve the rolled croissant into a crescent shape. Bring the two ends toward each other. They should not touch but should create a gentle curve.
Some bakers pinch the two ends together. This is optional. Traditional French croissants often have separated ends. The choice is yours.
Proofing Your Shaped Croissants
Proofing allows the yeast to create gas bubbles within the dough. These bubbles give croissants their airy texture. Proper proofing is essential for light, fluffy results.
Arranging on Baking Sheet
Line your baking sheet with parchment paper. Arrange the shaped croissants on the prepared sheet. Leave at least two inches of space between each croissant.
Croissants expand significantly during proofing and baking. Crowded croissants will touch and fuse together. Adequate spacing ensures even heat circulation.
Place croissants with the tucked point facing down. This weight helps keep the point in place during rising. The crescent curve should face upward.
Covering During Proofing
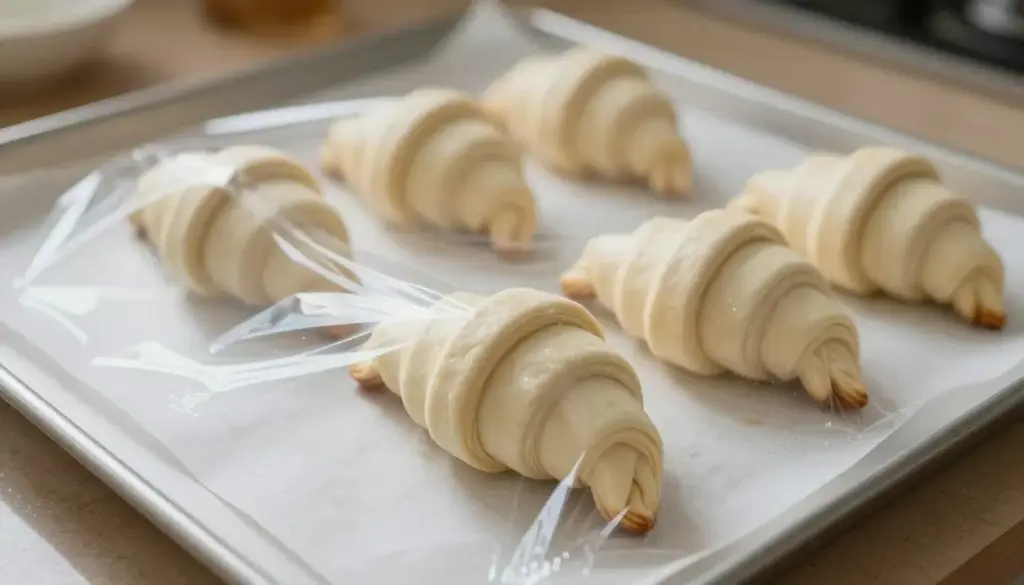
Lightly grease a sheet of plastic wrap with butter or cooking spray. Place the greased side facing down over the croissants. The grease prevents sticking to the rising dough.
Tuck the plastic wrap loosely around the edges of the baking sheet. The covering should not be tight. Rising dough needs room to expand upward.
The plastic wrap serves two purposes. It prevents the dough surface from drying out. It also traps moisture, creating a humid environment that promotes rising.
Room Temperature Proofing
Place the covered baking sheet in a warm spot. Room temperature between seventy and seventy-five degrees Fahrenheit is ideal. Avoid drafty areas.
The croissants need to proof until roughly doubled in bulk. This typically takes one to two hours. Time varies based on room temperature and dough temperature.
Warmer rooms speed up proofing. Cooler rooms slow it down. Watch the croissants rather than the clock. They are ready when they look puffy and jiggly.
Gently shake the baking sheet. Properly proofed croissants will wobble. They should feel soft and pillowy when lightly touched. The dough should spring back slowly when pressed.
Overnight Proofing Method
You can break up the work by using overnight proofing. After shaping the croissants and placing them on the baking sheet, cover with plastic wrap.
Immediately place the baking sheet in the refrigerator. The cold temperature slows yeast activity to nearly nothing. The croissants will proof very slowly overnight.
This method works for up to forty-eight hours. You can shape croissants one or two days before baking. This flexibility makes croissant-making more manageable.
When ready to bake, remove the baking sheet from the refrigerator. Let the croissants come to room temperature. This takes about one to two hours.
They will continue rising as they warm. They should roughly double from their shaped size. Then proceed with egg washing and baking.
Baking Perfect Golden Brown Croissants
Preparing the Oven
Preheat your oven to three hundred seventy-five degrees Fahrenheit. Allow at least fifteen to twenty minutes for full preheating. The oven must be completely hot before baking.
A fully preheated oven creates immediate steam when the croissants enter. This steam pushes the layers apart dramatically. Inadequate oven temperature produces flat, dense croissants.
Position the oven rack in the center position. This provides the most even heat distribution. Avoid the top rack, which can over-brown the tops.
Applying Egg Wash
Remove the plastic wrap from the proofed croissants. Beat one large egg with one or two teaspoons of water in a small bowl. Mix thoroughly until completely combined.
The water thins the egg slightly. This makes it easier to brush on smoothly. Pure egg can be too thick and creates streaky coverage.
Dip your pastry brush into the egg wash. Gently brush the mixture over each croissant. Cover all visible dough surfaces. Use a light touch to avoid deflating the proofed dough.
Pay special attention to crevices and folds. Egg wash in the creases can pool and create dark spots. Use a nearly dry brush in these areas.
The egg wash serves multiple purposes. It creates the shiny, golden brown surface. It helps seal the layers together slightly. It adds richness to the crust.
Baking Time and Temperature
Place the baking sheet in the preheated oven immediately after applying egg wash. Set a timer for fifteen minutes. Check the croissants at this point.
They should be starting to color lightly. The layers should be visibly puffing and separating. If they look pale, continue baking and check every two to three minutes.
Total baking time is typically fifteen to twenty minutes. Exact time depends on your oven and croissant size. Larger croissants need slightly longer.
The croissants are done when they are deeply golden brown all over. The color should be rich and appealing, not pale. They should look puffed and flaky.
The bottoms should be golden brown as well. Carefully lift one croissant to check underneath. Pale bottoms indicate underbaking.

Cooling
Remove the baking sheet from the oven when the croissants are golden brown. Transfer the croissants to a wire cooling rack immediately. This prevents soggy bottoms.
Let them cool for at least ten to fifteen minutes before eating. The interior continues cooking slightly as they cool. Very hot croissants can seem doughy inside.
The butter needs time to solidify slightly as well. Croissants eaten immediately can seem greasy. Slightly cooled croissants have better texture.
However, croissants are best within a few hours of baking. The crust softens as they sit. The texture becomes less crisp over time.
Common Croissant Problems and Solutions
Why did butter leak out during baking?
Butter leakage happens when the butter was too warm before baking. The proofing process should bring the butter to room temperature gradually. Very cold butter does not leak but also does not create proper steam.
Make sure your croissants proofed completely. Underproofed croissants with cold butter can leak. The dough structure must set before the butter melts.
Also check your oven temperature. An oven that is too hot melts butter faster than the dough can set. Three hundred seventy-five degrees Fahrenheit is correct for most ovens.
Why are my croissants dense instead of flaky?
Dense croissants result from insufficient lamination. You may not have completed enough folds. The dough needs four to six total folds minimum.
Dense texture also comes from butter blending into the dough during rolling. This happens when the butter becomes too warm. Always keep the dough cold during lamination.
Overproofing causes density too. Overproofed dough collapses and loses its structure. The yeast exhausts itself and cannot provide lift during baking.
Why are my croissants pale?
Pale croissants need more baking time or higher temperature. Make sure your oven is fully preheated to three hundred seventy-five degrees Fahrenheit.
Inadequate egg wash also causes pale color. Brush the entire surface thoroughly with egg wash. Apply a second coat if the first seems thin.
Some ovens run cool. Use an oven thermometer to verify actual temperature. Increase temperature by twenty-five degrees if your oven runs consistently cool.
Why is the center doughy?
Doughy centers indicate underbaking. The exterior browns before the interior finishes cooking. Bake until deeply golden brown all over.
Very large croissants need longer baking time. Reduce size slightly if consistently underbaked. Smaller croissants bake more evenly.
Lowering oven temperature by twenty-five degrees and extending baking time also helps. This allows the center to cook through before the outside over-browns.
Why did my croissants not rise?
Flat croissants suggest dead yeast. Check your yeast expiration date. Test yeast freshness by dissolving a pinch in warm water with sugar. Active yeast foams within ten minutes.
Too much salt can inhibit yeast. Measure salt carefully. Salt and yeast should not contact each other directly in the bowl before mixing.
Cold proofing environment slows rising dramatically. Find a warmer spot for proofing. Seventy to seventy-five degrees Fahrenheit is ideal.
Serving and Enjoying Your Homemade Croissants
Fresh croissants need minimal embellishment. Their buttery flavor and flaky texture shine on their own. However, there are many delicious ways to enjoy them.
Classic Serving Methods
Serve warm croissants with soft European butter. High-quality butter complements the pastry beautifully. The butter melts into the warm layers.
Fruit preserves are traditional accompaniments. Strawberry jam, apricot preserves, or raspberry jam all work wonderfully. The sweetness balances the buttery richness.
Honey provides another classic option. Drizzle it lightly over a split croissant. Lavender honey or orange blossom honey add interesting flavor notes.
Sweet Toppings
- Nutella or chocolate hazelnut spread
- Almond butter or peanut butter
- Lemon curd for bright citrus flavor
- Apple butter for autumn appeal
- Cream cheese with fresh berries
Savory Options
- Sliced ham and Swiss cheese
- Smoked salmon with cream cheese
- Scrambled eggs and bacon
- Chicken salad for lunch
- Turkey and avocado for sandwiches
Filled Croissant Variations
Add fillings before rolling the triangles. This creates stuffed croissants with different flavors. Place fillings across the wide end before rolling.
Chocolate croissants are extremely popular. Place small pieces of dark chocolate across the base. Use about one ounce of chocolate per croissant. Roll as usual.
The chocolate melts during baking. It creates pockets of rich chocolate throughout the pastry. These are called pain au chocolat in French bakeries.
Almond croissants start with plain baked croissants. Split them horizontally. Spread almond cream inside. Top with sliced almonds and powdered sugar. Bake briefly to warm through.
Ham and cheese croissants make excellent breakfast or brunch items. Add thin ham slices and grated Gruyere before rolling. The cheese melts beautifully during baking.

Storing and Reheating Croissants
Room Temperature Storage
Store baked croissants in an airtight container at room temperature. They stay fresh for up to one week. The texture changes slightly each day.
Day-old croissants lose some crispness. The exterior becomes softer. The flavor remains good. Many people prefer slightly aged croissants for certain uses.
Do not refrigerate baked croissants. Refrigeration dries them out quickly. The cold temperature makes them stale faster than room temperature storage.
Freezing Baked Croissants
Croissants freeze exceptionally well. Freeze them in an airtight freezer bag or container. They keep for up to two months frozen.
Freeze croissants individually first on a baking sheet. Once frozen solid, transfer to a storage bag. This prevents them from sticking together.
Thaw frozen croissants at room temperature for about one hour. They defrost relatively quickly. Once thawed, reheat if desired.
Reheating for Best Texture
Reheat croissants in a preheated oven at three hundred fifty degrees Fahrenheit. Place them directly on the oven rack. Heat for five to seven minutes.
This method restores crispness to the exterior. The interior warms through completely. The texture comes very close to fresh-baked.
Microwave reheating is faster but produces a softer texture. Microwave on fifty percent power for twenty to thirty seconds. The croissants will be warm but not crispy.
Toaster ovens also work well for reheating. Use the same temperature and time as a conventional oven. Watch carefully to prevent over-browning.
Creative Croissant Recipe Variations
Whole Wheat Croissants
Replace up to half the all-purpose flour with whole wheat flour. This adds nutty flavor and more fiber. The texture becomes slightly denser.
Whole wheat flour absorbs more liquid. You may need to add one or two extra tablespoons of milk. The dough should maintain the same consistency.
Sweet Croissants
Increase sugar to one-half cup for sweeter croissants. Brush with sugar syrup after baking. Dissolve equal parts sugar and water, then brush over warm croissants.
Add one teaspoon of vanilla extract to the milk before mixing. This creates vanilla croissants with subtle flavor.
Savory Herb Croissants
Mix two tablespoons of chopped fresh herbs into the flour. Rosemary, thyme, or chives work beautifully. These create savory croissants perfect for sandwiches.
Add one teaspoon of garlic powder to the flour mixture. Garlic croissants pair wonderfully with soups and salads.
Miniature Croissants
Cut smaller triangles with a three-inch base instead of five inches. Roll and shape as usual. These create bite-sized croissants.
Reduce baking time to ten to twelve minutes. Watch carefully. Small croissants brown faster than standard size.
Complete Croissant Recipe
Easy Homemade Croissant Recipe
Prep Time: 40 minutes
Resting Time: 4 hours
Baking Time: 20 minutes
Total Time: 5 hours
Servings: 15 croissants
Ingredients
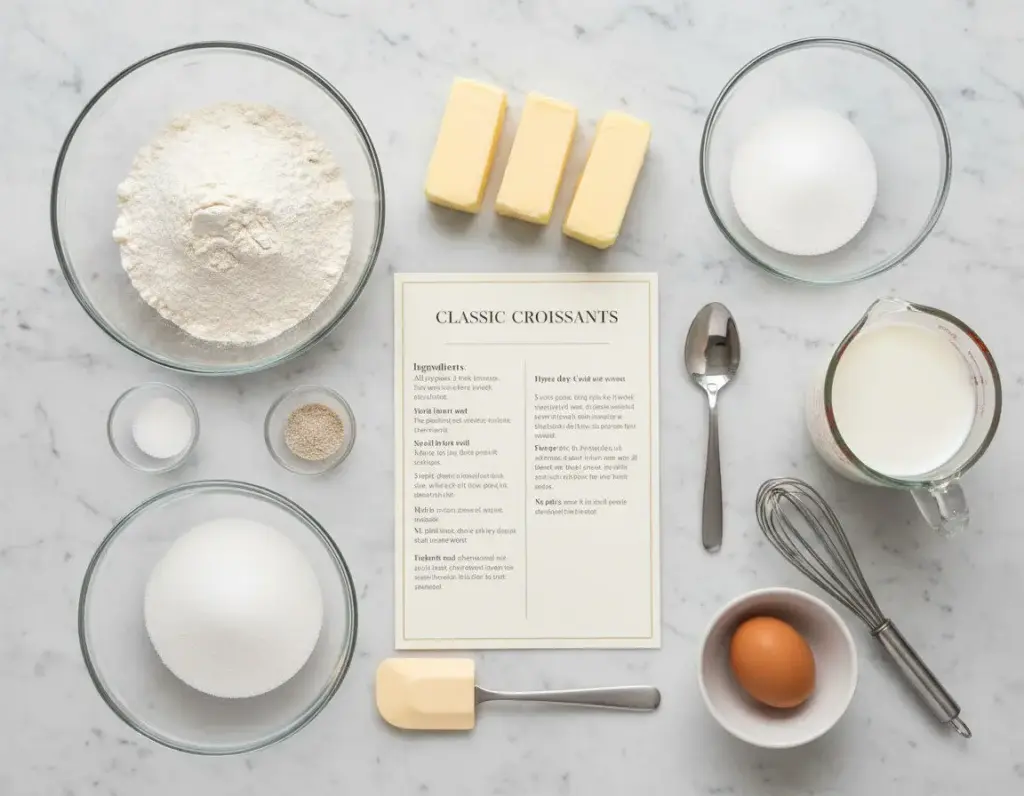
- 4 cups (500g) all-purpose flour
- 1/3 cup (79g) granulated sugar
- 4 teaspoons (20g) active dry yeast
- 2 1/4 teaspoons (11g) kosher salt
- 1 1/4 cups (284g) unsalted butter, cold
- 1 cup (244g) milk, cold
- 1 large egg plus 2 teaspoons water for egg wash
Instructions
- Combine flour, sugar, yeast, and salt in a large bowl. Whisk together thoroughly.
- Slice cold butter into thin pieces about one-eighth inch thick. Toss butter slices in the flour mixture until every piece is coated.
- Add cold milk and stir with a wooden spoon until a stiff dough forms. The dough should pull cleanly from the bowl sides. Add slightly more milk if needed.
- Wrap the dough tightly in plastic wrap. Refrigerate for one hour.
- Place chilled dough on a lightly floured surface. Roll into a long rectangle. Fold into thirds like a letter.
- Turn the dough ninety degrees. Roll out again and fold into thirds. Repeat this process three to five more times until the dough is smooth with large butter streaks visible. Chill if butter becomes soft.
- Wrap the laminated dough tightly and refrigerate for one more hour.
- Divide dough in half. Roll one half into a rectangle about ten inches wide, twenty-two inches long, and one-eighth inch thick.
- Trim uneven edges. Cut lengthwise down the center creating two long strips. Cut diagonally into triangles with five-inch bases.
- Make a half-inch notch at the wide base of each triangle. Roll from the wide end to the point, tucking the point underneath. Curve into a crescent shape.
- Place shaped croissants on parchment-lined baking sheet with two inches between each. Cover loosely with greased plastic wrap.
- Let proof at room temperature for one to two hours until doubled in size. Alternatively, refrigerate up to forty-eight hours, then bring to room temperature.
- Preheat oven to three hundred seventy-five degrees Fahrenheit.
- Beat one egg with two teaspoons water. Brush gently over proofed croissants.
- Bake for fifteen to twenty minutes until deeply golden brown and puffed.
- Transfer to a wire rack. Cool at least ten minutes before serving.
Notes
Instant yeast may substitute for active dry yeast. Use the same amount. Rising time may reduce by ten to fifteen minutes.
Keep dough cold throughout the process. Chill whenever butter feels soft.
Number of folds is flexible. Look for smooth dough with visible butter streaks rather than counting exact folds.
Nutrition per Croissant
Calories: 294 | Carbohydrates: 31g | Protein: 5g | Fat: 16g | Saturated Fat: 10g | Cholesterol: 42mg | Sodium: 360mg | Fiber: 1g | Sugar: 5g
Understanding Croissant Nutrition
Croissants are an indulgent treat. They contain significant butter, which contributes calories and fat. Understanding the nutrition helps you enjoy them mindfully.
Nutritional Profile
One homemade croissant from this recipe contains approximately two hundred ninety-four calories. Most calories come from butter and flour.
Each croissant provides about sixteen grams of fat. Ten grams are saturated fat from butter. Fat makes croissants rich and satisfying.
Carbohydrates total thirty-one grams per croissant. This includes five grams of sugar. The remaining carbohydrates come from flour.
Protein content is modest at five grams. Flour provides most protein. Croissants are not a significant protein source.
Comparing Homemade to Store-Bought
Homemade croissants often contain fewer additives than commercial versions. You control exactly what goes into them. No preservatives or artificial ingredients are needed.
Store-bought croissants may use margarine or shortening instead of real butter. These fats change the flavor and nutritional profile. Real butter provides vitamin A and K.
Many commercial croissants contain more sugar. This increases calories and sweetness. Homemade versions let you control sugar content.
Enjoying Croissants in a Balanced Diet
Croissants are special occasion food for most people. They work well as weekend breakfast treats or holiday brunch items.
Balance rich croissants with lighter meals throughout the day. Pair them with fresh fruit and coffee for breakfast. The fruit adds vitamins and fiber.
Portion control helps. One croissant satisfies most people. The rich flavor and butter content create satiety.
The History and Tradition of Croissants
Despite their French identity, croissants have Austrian origins. The crescent shape supposedly commemorates a seventeen eighty-three Austrian military victory.
French bakers adopted and refined the recipe in the eighteen hundreds. They developed the lamination technique that creates extreme flakiness. French croissants became world-famous.
Traditional French bakeries start croissant production before dawn. The lamination and proofing require hours. Fresh croissants appear in bakery windows by breakfast time.
In France, croissants fall into two categories. Croissant au beurre uses only butter. Croissant ordinaire may contain margarine. The butter version is always superior.
French bakers shape butter croissants straight. Margarine croissants get the crescent curve. This visual distinction helps customers choose.
American bakeries rarely follow this convention. Most shape all croissants into crescents. The curved shape has become iconic worldwide.
Your Croissant Baking Journey Starts Now
Making croissants at home transforms from intimidating to achievable with this simplified approach. The process requires time but not advanced skills. Anyone can create beautiful, flaky croissants.
The key lies in temperature control and patience. Keep your dough butter cold during lamination. Allow adequate time for proofing. These two factors determine success more than anything else.
Your first batch may not be perfect. That is completely normal. Each attempt teaches you something. You develop a feel for the dough. You learn how it should look and feel at each stage.
The reward is worth the effort. Nothing compares to warm, homemade croissants fresh from your oven. The pride you feel sharing them with family and friends is immeasurable.
Start your croissant-making journey this weekend. Gather your ingredients. Set aside time to work through the process. You will surprise yourself with what you can create.

The satisfaction of mastering this classic French pastry stays with you forever. You gain confidence to tackle other challenging recipes. Your baking skills grow with each batch.
Share your croissant creations with others. Homemade croissants make thoughtful gifts. They show care and effort. Recipients appreciate the time and skill involved.
Most importantly, enjoy the process. Baking should bring joy, not stress. This simplified croissant recipe removes unnecessary complexity. Focus on the pleasure of creating something beautiful and delicious from simple ingredients.