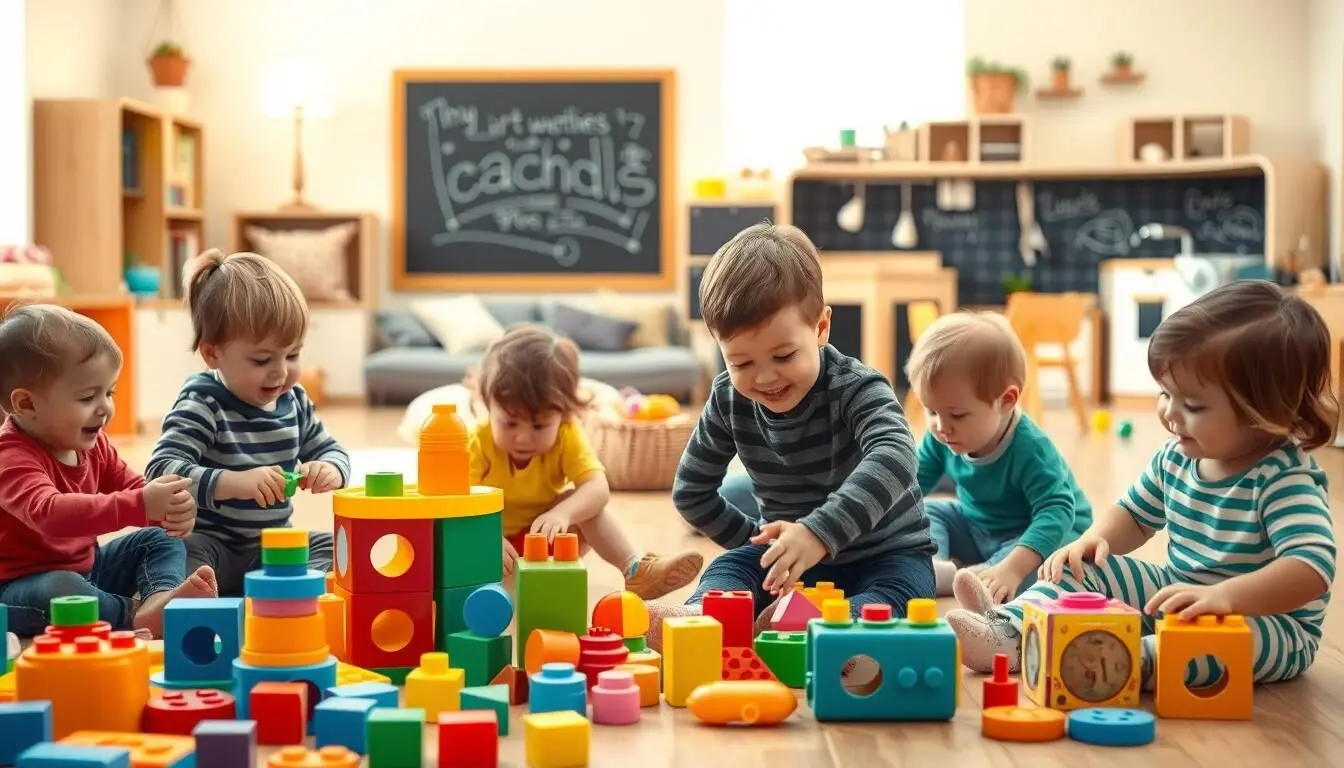
Creating Montessori-inspired toys at home isn’t just budget-friendly—it’s an opportunity to craft learning materials perfectly tailored to your child’s developmental needs. These DIY Montessori toys honor the principles of natural materials, purposeful design, and child-led exploration while requiring minimal supplies and basic crafting skills. Whether you’re new to Montessori or a seasoned practitioner looking for fresh ideas, these 32 handmade toys will engage your child’s developing senses, fine motor skills, and cognitive abilities through meaningful play experiences.

Sensory Exploration DIY Toys
Sensory experiences form the foundation of early learning in Montessori education. These DIY toys engage multiple senses while using simple, natural materials you likely already have at home. Each project supports your child’s sensory development through purposeful exploration of textures, sounds, and visual elements.

1. Discovery Sensory Bottles
Transform clear plastic bottles into captivating sensory tools by filling them with various materials. Create a calming bottle with colored water and vegetable oil, a sound bottle with rice or beans, or a discovery bottle with small objects suspended in clear hair gel. Securely glue the lids to prevent spills. These bottles offer visual tracking practice for infants and become tools for emotional regulation as children grow. Let your child shake, roll, and observe these bottles to discover how different materials move and interact.

2. Texture Matching Cards
Create pairs of matching texture squares using cardboard as a base and attaching different materials like sandpaper, felt, cotton balls, bubble wrap, and corrugated cardboard. Make two identical sets for matching games or a single set for sensory exploration. These cards develop tactile discrimination as children identify textures through touch. For younger children, guide their fingers across each texture while naming it. Older children can play matching games blindfolded, strengthening their sense of touch and memory simultaneously.

3. Sound Matching Cylinders
Repurpose cardboard tubes by sealing one end, filling pairs with identical materials (rice, beans, small pebbles), and sealing the other end. Cover with neutral-colored paper for a clean appearance. These cylinders develop auditory discrimination as children shake them to identify and match similar sounds. Start with just three distinct pairs for younger children and increase the challenge by adding more subtle sound differences as their skills develop. This activity refines listening skills while introducing the concept of pairs and matching.
Enhance Your Sensory Play Collection
Download our free printable guide with 10 additional sensory play ideas and a materials checklist to create a comprehensive sensory exploration station at home.
Fine Motor Development DIY Toys
Developing precise hand movements is crucial for writing, self-care, and countless daily activities. These DIY Montessori toys specifically target fine motor skills through activities that require pinching, grasping, transferring, and manipulating objects. Using materials from around your home, you can create engaging tools that strengthen little hands while providing hours of concentrated play.

4. Threading Activities Set
Create a collection of threading activities using materials like wooden beads, cardboard tubes, and pipe cleaners. Cut cardboard into shapes with holes punched around the edges for lacing with yarn. Thread wooden beads onto pipe cleaners for younger children who are still developing coordination. These activities strengthen finger muscles and hand-eye coordination while developing concentration. Start with larger holes and thicker string for beginners, gradually introducing smaller beads and thinner lacing materials as fine motor skills develop.

5. Coin Drop Box
Transform a cardboard box into a coin drop activity by cutting a slot in the lid and creating “coins” from cardboard circles. For added durability, cover the box with contact paper and paint the cardboard coins with metallic paint. This activity develops the pincer grasp as children pick up and insert coins through the slot. The satisfaction of dropping items into a container motivates repeated practice. Extend the learning by adding number recognition—draw different quantities of dots on each coin and encourage counting as they drop.

6. Transfer Tools Collection
Create a transferring station with small containers and various tools for moving objects. Include tweezers, tongs, spoons, and droppers alongside small objects like beans, pom-poms, or buttons. Place matching containers side by side and demonstrate transferring objects from one to another using different tools. This activity develops precision grip, hand strength, and concentration. For younger children, start with larger objects and tools like spoons or chunky tongs. As skills develop, introduce smaller items and more precise tools like tweezers.
Master Fine Motor Activities
Download our printable templates for creating progressive fine motor activities, including patterns for lacing cards, tracing boards, and precision transfer games.
Practical Life DIY Montessori Tools
Practical life activities are central to Montessori education, helping children develop independence, concentration, and coordination through meaningful work. These DIY tools allow children to practice real-life skills while building confidence in their abilities. Using everyday household items, you can create engaging practical life stations that children will return to again and again.

7. Pouring Station
Create a water pouring practice station using small pitchers and containers of various sizes. Start with dry materials like rice or beans before introducing water with a drop of food coloring for visibility. Include a small sponge for cleaning spills to foster independence. This activity develops wrist control, concentration, and eye-hand coordination while teaching careful movement. Place the entire setup on a tray with a waterproof mat underneath to contain spills and define the workspace. Let your child practice pouring from left to right, gradually working with smaller containers as skills develop.

8. Dressing Frames
Create dressing practice frames using cardboard and fabric with different fasteners attached. Make separate frames for buttons, zippers, snaps, velcro, and laces. Cut two pieces of fabric slightly larger than your cardboard frame, attach your chosen fastener to both pieces, then glue the fabric to opposite sides of the frame. These frames isolate the specific movements needed for dressing skills, allowing children to practice each fastener type independently. The structured format helps children focus on mastering one skill at a time before combining them in actual clothing.

9. Washing Station
Create a miniature washing station with a small basin, homemade washboard (corrugated cardboard works well), and tiny clothesline with clothespins. Include small washcloths or doll clothes for washing and hanging. This multi-step activity develops hand strength, sequencing skills, and care for the environment. The process of wetting, soaping, scrubbing, rinsing, wringing, and hanging clothes to dry provides a complete work cycle that satisfies children’s need for purposeful activity. Set up this station outdoors or on a waterproof mat to manage splashes.
Create a Complete Practical Life Area
Download our comprehensive guide to setting up 15 practical life stations using household items, with step-by-step instructions and developmental benefits explained.
Language Development DIY Toys
Language acquisition flourishes in environments rich with meaningful vocabulary and opportunities for expression. These DIY Montessori language materials support everything from early sound discrimination to reading preparation using simple materials and thoughtful design. Each activity builds upon natural language development while making abstract concepts concrete.

10. Object-to-Picture Matching
Create simple cards with clear images of objects from your child’s environment, then gather the corresponding real items. Start with just 3-5 pairs for young children, increasing as their matching skills develop. This activity builds vocabulary by connecting concrete objects with their two-dimensional representations—a foundation for reading readiness. Guide your child to place each object beside its matching picture, naming each item clearly. This concrete-to-abstract connection helps children understand that images represent real things, a crucial concept for later literacy.

11. Sandpaper Letters
Create tactile letters by cutting sandpaper into lowercase letter shapes and mounting them on painted wooden squares (traditionally blue for consonants, red for vowels). These letters provide a sensory experience of letter shapes while introducing phonetic sounds. When presenting each letter, trace it with two fingers while pronouncing its sound (not name). The combination of visual, tactile, and auditory input creates multiple neural pathways for learning letter sounds. Start with letters in your child’s name or sounds that are easily distinguished before introducing similar sounds.

12. Sound Bins
Create letter sound collections using small containers labeled with individual letters. Fill each container with miniature objects or pictures that begin with that letter’s sound. For example, a “b” container might hold a button, ball, and bear figure. These bins make abstract phonetic sounds concrete by connecting them to familiar objects. Introduce just a few sounds at a time, emphasizing the initial sound as you name each object. As children become familiar with more sounds, they can sort objects into the appropriate bins independently.
Build Your Language Materials Collection
Download our printable language cards, letter templates, and progressive language activities to create a comprehensive DIY Montessori language area.
Mathematical Concept DIY Materials
Montessori mathematics begins with concrete experiences that gradually lead to abstract understanding. These DIY math materials allow children to literally hold and manipulate quantities before working with symbols. Using simple household items, you can create powerful tools that build number sense, counting skills, and early operations through hands-on exploration.

13. Spindle Box
Create a spindle box using a muffin tin or divided container with compartments numbered 0-9. Gather 45 identical objects (craft sticks, clothespins, or chopsticks work well) to serve as “spindles.” Children place the corresponding number of spindles in each numbered section, physically experiencing what each quantity represents. This activity concretely demonstrates that numbers represent specific quantities and introduces the concept of zero as “nothing.” The physical act of counting and placing items reinforces one-to-one correspondence—a fundamental math skill.

14. Number Rods
Create simplified number rods by painting craft sticks in alternating colors and gluing them together to form rods of increasing length from 1-10. These rods provide a visual and tactile representation of quantities and their relationships. Children can arrange the rods in sequence, experiencing how each number is one unit larger than the previous. This concrete representation helps children internalize number relationships before working with abstract symbols. Extend the activity by placing small number cards beside each rod, connecting the quantity with its symbol.

15. Counting Trays
Create individual counting trays using small containers, each with a number card and corresponding quantity of identical objects. Start with numbers 1-5, using natural items like stones, shells, or wooden beads as counting objects. These trays isolate each quantity for focused exploration and create a clear visual impression of what each number represents. Guide your child to count the objects on each tray while touching each item, then match the written numeral. This multi-sensory approach connects the abstract symbol with its concrete quantity.
Create Your Math Materials Collection
Download our printable templates and step-by-step instructions for creating 12 essential Montessori math materials using simple household items.
Scientific Exploration DIY Tools
Montessori science activities focus on observation, classification, and exploration of the natural world. These DIY science materials encourage children to examine their environment with precision and curiosity. Using simple materials, you can create tools that develop scientific thinking while nurturing a connection to the natural world.

16. Nature Classification Cards
Create classification cards by photographing items from nature (leaves, seeds, flowers) and printing the images. Collect the actual specimens and preserve them when possible. Children match the real items to their images, developing observation skills and learning to notice details. This activity connects children to the natural world while building vocabulary and classification skills. Extend the learning by creating category cards (trees, flowers, seeds) and having children sort specimens into these broader groups, introducing the concept of hierarchical classification.

17. Weather Station
Create a simple weather observation station with homemade tools: a rain gauge from a clear plastic bottle with measurement markings, a wind sock from fabric and a coat hanger, and a temperature display using a real thermometer mounted on cardboard. This station encourages daily scientific observation and record-keeping. Children develop skills in measurement, comparison, and identifying patterns over time. Create a simple weather journal where children can record their observations using drawings or simple symbols, introducing the scientific practice of documentation.

18. Magnetic Exploration Kit
Create a magnetic testing station with a child-safe magnet, two containers labeled “magnetic” and “non-magnetic,” and a collection of various small objects to test. This hands-on activity introduces the scientific concept of magnetism through direct experimentation rather than abstract explanation. Children develop prediction skills by guessing which items will be attracted to the magnet before testing their hypotheses. Extend the learning by creating a chart where children can record their findings, introducing scientific documentation and reinforcing classification skills.
Expand Your Science Exploration
Download our science exploration guide with 15 additional DIY science activities, observation journals, and classification materials for young scientists.
Additional DIY Montessori Toys
These versatile DIY Montessori materials support various developmental areas while maintaining the principles of simplicity, purpose, and child-led learning. Using everyday materials, you can create these engaging tools that grow with your child and support multiple skills simultaneously.

19. Object Permanence Box
Create an object permanence box using a small cardboard box with a hole cut in the top and an opening at the bottom front. Include a small ball that can be dropped through the hole and retrieved from the bottom. This toy supports cognitive development as infants learn that objects continue to exist even when out of sight. The satisfaction of cause and effect (dropping the ball and finding it again) motivates repeated practice. For younger babies, demonstrate slowly, allowing them to observe the ball’s complete journey before they try themselves.

20. Color Matching Tablets
Create color matching cards using paint sample cards from hardware stores. Cut the cards into individual color squares and create matching pairs. For beginners, use distinctly different colors; for advanced matching, include gradations of the same color. This activity refines visual discrimination while introducing color vocabulary. Present the activity by mixing up the colors and demonstrating how to find matching pairs. For younger children, start with just 3-4 primary colors before introducing more subtle distinctions.

21. Shape Sorter
Create a shape sorter using a cardboard box with different shaped holes cut into the lid. Make corresponding shapes from thick cardboard or wood that fit through the matching holes. This classic toy develops shape recognition, spatial awareness, and problem-solving skills. Start with basic shapes (circle, square, triangle) before introducing more complex ones. The self-correcting nature of this activity allows children to work independently—the shape only fits through its matching hole, providing immediate feedback without adult intervention.

22. Lacing Cards
Create lacing cards by cutting cardboard into various shapes and punching holes around the edges. Provide colorful yarn or shoelaces with tape-wrapped ends for easier threading. These cards develop fine motor coordination, hand-eye coordination, and concentration. The repetitive motion of threading is both calming and focusing for many children. Start with fewer, larger holes for beginners, gradually introducing cards with more holes as skills develop. For added interest, decorate the cards with simple drawings or photos before laminating for durability.

23. Posting Box
Create a posting box by cutting different shaped slots in the sides of a cardboard box and making flat objects that fit through each slot. This activity develops hand-eye coordination, spatial awareness, and problem-solving skills. The satisfaction of successfully inserting objects motivates continued practice. For younger children, start with a single large slot and corresponding shapes before introducing multiple options. This activity can grow with your child—add smaller slots and more complex shapes as their skills develop.

24. Mystery Bag
Create a tactile exploration bag using an opaque fabric pouch filled with various small objects with distinctive shapes and textures. Children reach into the bag without looking and use their sense of touch to identify objects before removing them. This activity develops tactile discrimination, vocabulary, and concentration. Start with very distinct objects before introducing items with subtle differences. For older children, include matching objects outside the bag that they must pair with the items they feel inside, adding a memory component to the activity.

25. Sound Cylinders
Create sound matching containers using identical opaque containers (film canisters work well) filled with different materials that make distinct sounds when shaken. Make two of each sound for matching activities. These cylinders develop auditory discrimination and memory while introducing the concept of pairs. Start with very different sounds (rice vs. bells) before introducing more subtle distinctions (rice vs. couscous). This activity prepares children for the sound distinctions needed for phonetic awareness in language development.

26. Button Snake
Create a threading activity by attaching a large button to one end of a thick shoelace or rope. Cut different shapes from felt with a buttonhole in the center of each. Children practice fine motor skills by pushing the button through each hole and sliding the shape down the rope. This activity develops hand strength, coordination, and concentration while providing practice with the buttoning motion. Start with larger buttonholes before gradually decreasing the size as skills develop. The colorful shapes sliding down the rope provide visual feedback that motivates continued practice.

27. Lock Box
Create a busy box by attaching different types of locks, latches, and fasteners to a wooden box. Include simple latches, hook and eye closures, slide bolts, and other mechanisms that children can manipulate. This activity develops fine motor skills, problem-solving abilities, and persistence. The variety of movements required exercises different muscle groups in the hand while providing practice with fasteners found in the child’s environment. Place a small surprise inside the box as motivation for opening all the locks.

28. Balance Scales
Create a simple balance using a coat hanger suspended from a stand with small containers hanging from each end. Provide objects of different weights for comparison and exploration. This hands-on tool introduces the concept of weight and measurement through direct experience rather than abstract explanation. Children can predict which objects are heavier before testing their hypotheses on the scale. For older children, include a set of uniform weights (like identical stones) that can be used to measure how many units various objects weigh.

29. Continent Puzzle Map
Create a simplified continent puzzle by tracing continent shapes onto cardboard, cutting them out, and painting each continent a different color (following traditional Montessori colors if desired). Mount these on a blue background representing oceans. This hands-on geography material introduces continent shapes and names through concrete exploration. Start by focusing on the continent where you live before introducing others. The puzzle format makes abstract geographical concepts tangible for young children while developing spatial awareness and fine motor skills.

30. Land, Air, Water Sorting
Create a classification activity with three labeled sections (land, air, water) and a collection of small objects or pictures to sort into each category. Include animals, vehicles, and other items that clearly belong in one environment. This activity develops classification skills while building vocabulary and knowledge about different environments. The concrete sorting experience helps children internalize these categories before working with more abstract concepts. Extend the activity by adding objects that cross categories (like amphibians or seaplanes) for more advanced discussion.

31. Texture Dominoes
Create tactile dominoes by gluing different textured materials to halves of rectangular cardboard pieces, similar to regular dominoes but with textures instead of dots. Children match textures by placing domino pieces end to end. This game develops tactile discrimination while introducing game rules and turn-taking. The self-correcting nature of matching textures allows children to play independently or with others. For younger children, start with very distinct textures before introducing more subtle variations as their discrimination skills develop.

32. Movable Alphabet
Create a simplified movable alphabet by cutting lowercase letters from cardboard and painting them in the traditional Montessori colors (blue for consonants, red for vowels). Store them in a divided container with separate compartments for each letter. This tool allows children to build words phonetically before they develop the fine motor skills needed for writing. The physical manipulation of letters makes the abstract process of word building concrete and accessible. Start with short phonetic words before gradually introducing phonograms and sight words as reading skills develop.

33. Nature Exploration Kit
Create a portable nature study kit with homemade tools: a cardboard tube magnifier (clear plastic secured over one end), collection containers from recycled jars, a small notebook for observations, and simple field guides with your drawings of common local plants and insects. This kit encourages scientific observation and connection with nature. The combination of tools supports different types of exploration—collecting, observing details, and documenting findings. Take this kit on neighborhood walks or use it in your own backyard to discover the natural world right outside your door.
Complete DIY Montessori Resource Collection
Download our comprehensive guide with printable templates, material lists, and step-by-step instructions for all 32 DIY Montessori toys plus bonus activities for each developmental area.
Key Montessori Principles for DIY Materials

Creating a DIY Montessori Environment at Home
Creating your own Montessori materials isn’t just about saving money—it’s about crafting learning tools perfectly tailored to your child’s unique interests and developmental needs. These 32 DIY Montessori toys demonstrate that meaningful learning materials don’t require expensive specialty supplies or advanced crafting skills. With basic household items and a thoughtful approach, you can create an enriching environment that honors your child’s natural development.
Remember that the Montessori approach values quality over quantity. Rather than creating all these materials at once, observe your child to determine which activities might best support their current interests and developmental stage. Introduce just a few materials at a time, rotating them based on your child’s engagement. This thoughtful curation prevents overwhelm while maintaining interest through novelty and relevance.
Start Your DIY Montessori Journey Today
Download our starter guide with the 10 essential DIY Montessori toys for your child’s current age, complete with printable templates, material lists, and step-by-step instructions.