Making homemade baby toys is fun and rewarding for parents. These toys are affordable and can be made to fit your child’s needs.

These Montessori-inspired baby toys help kids learn by exploring. By making your own, you can make sure they are safe and interesting for your child.
Our guide will show you the good things about easy diy baby toys. We’ll also give you simple projects to start your creative journey.
Key Takeaways
- Benefits of homemade toys for baby’s development
- Understanding Montessori principles for child development
- Practical DIY projects for Montessori-inspired toys
- Budget-friendly options for baby toys
- Tips for creating safe and engaging homemade toys
The Benefits of Homemade Toys for Baby Development
Homemade toys offer many benefits for babies. They help with development and are good for the environment. Making your own toys lets you give your child a unique and fun play experience.

Developmental Advantages Over Commercial Toys
Homemade toys have big advantages over store-bought ones. They are made from natural materials that babies find more interesting. This helps with their senses and makes them want to explore more.
Also, homemade toys can be made just for your child. They can help with things like fine motor skills or solving problems. This makes playtime more fun and helpful for your baby.
Cost-Effectiveness and Sustainability
Making your own toys is good for your child and the planet. It’s cost-effective and helps reduce waste. You can use things you might throw away to make toys, which is good for the environment.
Plus, homemade toys can last a long time. They are made to be strong and can handle lots of play. This means you won’t have to buy new toys as often, saving money and reducing waste.
Understanding Montessori Principles in Baby Play
For babies, the Montessori method is about making a space that encourages curiosity and growth through play. It focuses on letting children learn by themselves and through hands-on activities. These activities are designed to match the child’s age and developmental stage.
“The greatest sign of success for a teacher… is to be able to say, ‘The children are now working as if I did not exist.'” – Maria Montessori. This quote shows the heart of the Montessori method. It highlights how important it is for caregivers to guide, not control.
Key Montessori Concepts for Infants
Montessori ideas help parents pick toys that spark curiosity and learning. For babies, this means giving them Montessori-inspired baby toys that are easy yet engaging. Key ideas include:
- Encouraging independence through self-directed play
- Fostering a sense of order and organization
- Promoting fine motor skills through practical activities
By using these ideas in simple baby toy crafts, parents can make a caring space that supports their baby’s growth.

Natural Materials and Simplicity
Montessori toys are known for using natural materials and simple designs. Do-it-yourself infant toys made from wood, cotton, and other natural materials are better for the environment. They also give a real sensory experience to the child.
Simple designs mean the toys don’t overwhelm the child. This lets them focus on what they’re doing. It helps them concentrate and get more involved with the toy.
By knowing and using Montessori ideas, parents can make do-it-yourself infant toys that are both fun and help with learning and motor skills.
Essential Materials for Creating DIY Baby Toys
Choosing the right materials is key to making great DIY baby toys. You want them to be fun, safe, and good for your baby’s growth. When making homemade baby sensory toys, pick wisely.
Safe Materials Checklist
When making easy baby toy projects, safety comes first. Here are some safe options:
- Non-toxic woods like birch or maple
- Natural fabrics such as cotton or linen
- Bamboo or recycled paper products
- Silicone for parts that need to be flexible
Avoid materials that could harm your baby. Stay away from small parts, sharp edges, and toxic chemicals.
Budget-Friendly Supply Sources
Creating budget-friendly baby toys doesn’t have to cost a lot. Here are some ways to find affordable materials:
- Repurpose items you already have at home, like old clothes for fabric or cardboard tubes for sensory toys.
- Visit thrift stores or garage sales for inexpensive materials.
- Use natural materials found outdoors, like pinecones or leaves, for sensory experiences.
- Look for sales or discounts at craft stores.
Being creative and planning can help you make lots of fun and educational toys. You don’t have to spend a lot.
Sensory Development Toys for 0-6 Months
The first six months of a baby’s life are full of discovery. Homemade sensory toys are key in this journey. Babies explore their world through senses. Toys that stimulate these senses help their development.
Fabric Texture Books
Fabric texture books introduce babies to various textures. This enhances their tactile experience. You’ll need fabrics like cotton, velvet, and silk, and basic sewing skills.
- Cut the fabrics into pages, making sure they’re big enough for your baby to hold.
- Sew the pages together to make a simple book.
- Add ribbons or buttons for extra fun.
High-Contrast Black and White Cards
High-contrast black and white cards boost a baby’s visual skills. They help babies tell different contrasts apart.
| Material | Size | Usage |
|---|---|---|
| Black and white cardstock | 5×5 inches | Show to baby during playtime |
| Laminated cards | 4×4 inches | Use for longer durability |
Homemade Rattles and Shakers
Rattles and shakers are perfect for hearing development. Making them at home is easy. You’ll need empty containers, beads or rice, and decorations.
Fill the containers with beads or rice and close them well. Decorate them with colorful tape or stickers for fun.
By making these toys, you’re boosting your baby’s sensory experiences. You’re also building a strong bond through play.
Easy DIY Baby Toys for Motor Skills (6-12 Months)
Between six to twelve months, motor skill development is crucial. Simple DIY toys can greatly help with this. Babies at this age learn to move around and play with objects.
Making DIY toys for this age group is both enjoyable and rewarding. Here are some projects that boost your baby’s motor skills.
Object Permanence Box
An Object Permanence Box helps babies understand that things still exist even when they can’t see them. You’ll need a box and a small toy to make one.
- Cut a hole in the box, just large enough for the toy to pass through.
- Encourage your baby to drop the toy into the box and then retrieve it.
Pulling Toys with Ribbons
Pulling toys with ribbons are great for improving hand-eye coordination and fine motor skills. You can make one by attaching a toy to a ribbon or string.
| Material | Purpose |
|---|---|
| Small toy or object | The toy to be pulled |
| Ribbon or string | Allows the baby to pull the toy |
Simple Stacking Rings
Simple stacking rings are a classic toy that improves fine motor skills and hand-eye coordination. You can make them using wooden or plastic rings of different sizes.
- Start with a base rod or stick.
- Slide the rings onto the rod in varying order to challenge your baby.
These DIY toys not only improve motor skills but also make playtime fun. By using everyday items, you create a stimulating play area that encourages learning and exploration.
Language Development Toys for Babies
Helping babies learn language is easy with homemade toys. These toys stimulate their senses and support their growth. The right toys can make a big difference in a baby’s language skills.
DIY Sound Matching Containers
DIY sound matching containers are great for babies’ ears. They help babies learn to tell sounds apart. This skill is key for language growth.
- Fill several identical containers with different materials (e.g., beads, rice, sand, or small pebbles) to produce distinct sounds when shaken.
- Ensure the containers are securely sealed to prevent any choking hazards.
- Label each container with its contents to help your baby associate the sound with the object.
Tip: Use different containers (like metal, plastic, or wood) to change the sound quality.
Picture Cards with Familiar Objects
Picture cards with familiar objects are great for learning new words. They help babies connect images with real things. This is how they start to understand words and their meanings.
| Object | Image Description | Learning Outcome |
|---|---|---|
| Mama’s Face | A clear, smiling face | Recognizing family members |
| Common Toys | Images of toys like blocks or dolls | Vocabulary building |
| Daily Objects | Pictures of items like spoons or cups | Understanding everyday items |
Dr. Maria Montessori said, “The greatest sign of success for a teacher is to be able to say, ‘The children are now working as if I did not exist.'” This shows how important self-learning tools like picture cards are.
“The children are now working as if I did not exist.”
Make picture cards with objects and actions your baby sees every day. This helps with vocabulary and understanding the world.
Cognitive Development Projects for Toddlers (12-24 Months)
Engaging toddlers in cognitive development projects boosts their problem-solving skills. Toddlers are naturally curious. Their minds grow through fun, interactive activities.
Using DIY toys from recycled materials is smart and green. It’s also good for your wallet. Here are some fun projects to try:
Shape Sorters from Recycled Materials
Shape sorters are great for problem-solving. You can make one from cardboard boxes and shapes. Here’s how:
- Cut out various shapes (e.g., squares, circles, triangles) from the cardboard.
- Create a box with holes for the shapes.
- Let your toddler sort the shapes and fit them into the box.
Homemade Puzzles
Puzzles are fantastic for cognitive growth. You can make simple puzzles with:
- Cardboard cutouts of familiar objects.
- Photos of family members or pets.
- Simple scenes cut into pieces.
These puzzles sharpen memory and problem-solving skills.
Color Matching Activities
Color matching is both fun and educational. To make a color matching game:
- Gather objects of different colors (e.g., blocks, buttons, or cards).
- Create a simple grid or chart with colors.
- Have your toddler match the objects to the correct colors.
These activities are not just educational. They make learning fun and engaging for toddlers.
Practical Life Skills Toys (18-36 Months)
Toddlers learn important life skills through play. Practical life toys help them become independent and develop fine motor skills. They love to imitate adults.
Button and Zipper Boards
Button and zipper boards help with fine motor skills. They let kids practice dressing in a safe way. You need wood or cardboard, buttons, zippers, and fabric to make one.
- Cut out a board of suitable size.
- Attach different types of buttons and zippers.
- Ensure the materials are safe and durable.
Water Pouring Station
A water pouring station boosts hand-eye coordination and fine motor skills. It’s also fun for learning about volume and measurement.
“The best way to make children good is to make them happy.” – Oscar Wilde
To make a water pouring station, you need a tray, cups or jugs, and water. Adding food coloring makes it more fun.
Homemade Lacing Cards
Homemade lacing cards are great for fine motor skills. You can make them with cardboard, lace or string, and designs.
- Cut out shapes or designs from cardboard.
- Punch holes around the edges.
- Provide a lace or string for the child to thread through the holes.
These toys help toddlers develop important skills while having fun. Including these activities in daily play helps build a strong foundation for the future.
Adapting and Extending the Life of Your Homemade Toys
Homemade toys are special because you can change them as your baby grows. This makes the toy stay fun and challenging for your child. It also helps the toy last longer.
Modifying Toys as Baby Grows
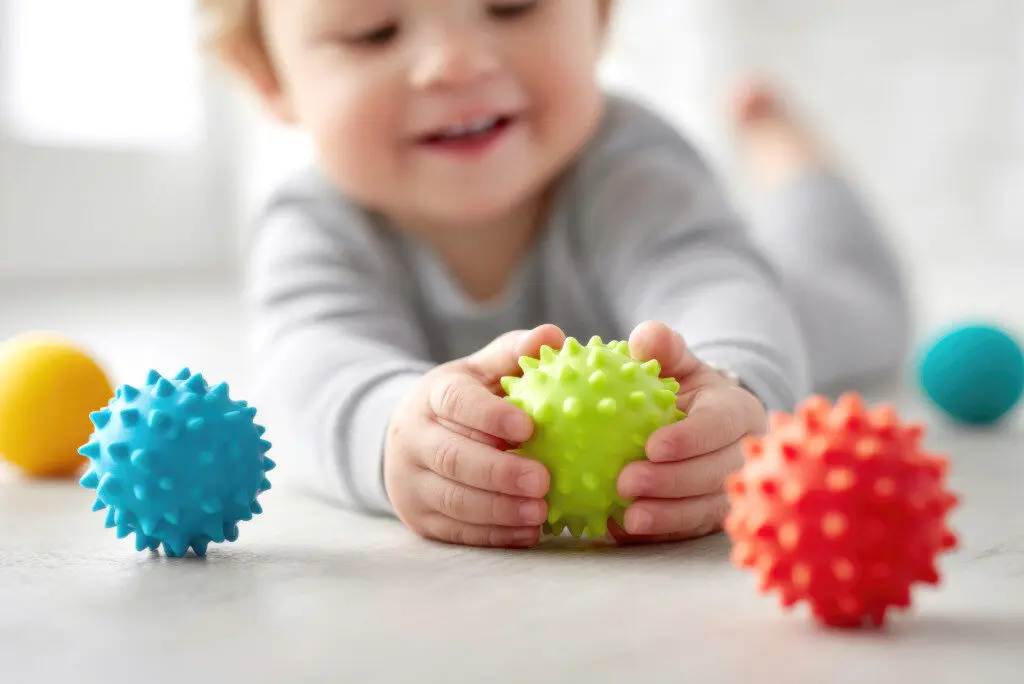
As your baby gets older, their needs and skills change. You can make your homemade toys better by adding new things or making them harder. For example, you can make a sensory ball more fun by adding different textures or weights.
Here are some tips for changing your homemade toys:
- Add new materials or textures to keep the toy interesting.
- Adjust the size or complexity of the toy to match your baby’s growing skills.
- Repurpose the toy for a different age or developmental stage.
| Toy | Initial Age | Modification | New Age |
|---|---|---|---|
| Sensory Ball | 6 months | Add different textures | 12 months |
| Stacking Cups | 12 months | Add more cups or different sizes | 24 months |
Creating Toy Sets That Work Together
Creating toy sets that work together is a great way to make your homemade toys last longer. By making toys that go well together, you can create a play world that grows with your child. For example, a set of stacking rings can be used in many ways as your child gets older, from simple stacking to making patterns.
- Designing toys with interchangeable parts.
- Creating a series of toys that build on each other in terms of complexity or theme.
- Making toys that can be used in different contexts or environments.
By making your homemade toys last longer, you save money and help the planet. It also encourages your child’s creativity and supports their growth in a fun way.
Conclusion: Nurturing Development Through Play
Making easy DIY baby toys is a fun way to help your baby grow. It lets you create a space that encourages learning and development. This is all thanks to the principles behind these toys.
Helping your baby develop is about more than just toys. It’s about their senses, motor skills, language, and thinking. DIY toys are a great, affordable way to support this growth.
Using Montessori ideas and natural materials can make your play area special. It helps your baby become independent and curious. As your baby gets older, you can update your toys to keep them interesting.
Creating DIY toys is not just fun. It’s also a way to support your baby’s growth. Knowing you’re helping your baby learn makes it even more rewarding for you.